Gluten Free Lunch Recipes: Tired of The Same Thing? Discover Easy Ideas!
Are You Tired of the Same Old Lunch? The Gluten-Free Edition Doesn’t Have to Be Boring!
Are you staring into your refrigerator every lunchtime, feeling like you’re in a culinary Groundhog Day? Turkey sandwich on gluten-free bread again? Another sad salad that just doesn’t quite hit the spot? If you nod your head, you’re in a lunch rut. And if you’re also navigating the world of gluten-free eating, it can feel even more challenging to break free from the monotony. Finding exciting and delicious gluten free recipes for lunch might seem like searching for a unicorn in a haystack!
It’s a common struggle. When you first went gluten-free, maybe you felt like your lunch options suddenly shrunk. Goodbye to quick pasta salads, many restaurant sandwiches, and tons of convenient pre-packaged meals. And if you’re also looking for gluten free dairy free lunch recipes, the quest for variety can feel even tougher. Are you doomed to a lifetime of the same few meals on repeat?
Not! This article is your ultimate guide to escaping the gluten free lunch recipes boredom blues. We’re here to prove that gluten-free lunch recipes can be just as – or even more – exciting, flavorful, and satisfying than anything you used to eat. Forget those tired, uninspired lunches. Get ready to discover a treasure trove of easy gluten-free lunch recipes that will revolutionize your midday meal and make you look forward to lunchtime again! Whether you need gluten free lunch recipes for work, quick meals at home, or even gluten and dairy free lunch recipes, we’ve got you covered. Let’s ditch the lunch rut and dive into a world of deliciousness!
Table of Contents
Mastering the Gluten-Free Lunch Game: Essential Tips & Techniques
Creating fantastic gluten-free lunch recipes regularly isn’t about complicated gourmet cooking. It’s about having the right strategies and a few clever techniques up your sleeve. Think of it like mastering a game – once you know the rules and have a few winning moves, you can play (and in this case, cook) like a pro! Let’s unlock the secrets to stress-free and delicious gluten-free lunches.
Stocking Your Gluten-Free Pantry for Lunch Success
Imagine having a treasure chest of ingredients ready to whip up a delicious lunch at a moment’s notice. That’s what a well-stocked gluten-free pantry is like! Having the right staples on hand makes creating easy gluten-free lunch recipes so much simpler. Here are some essential items to keep in your gluten-free pantry:
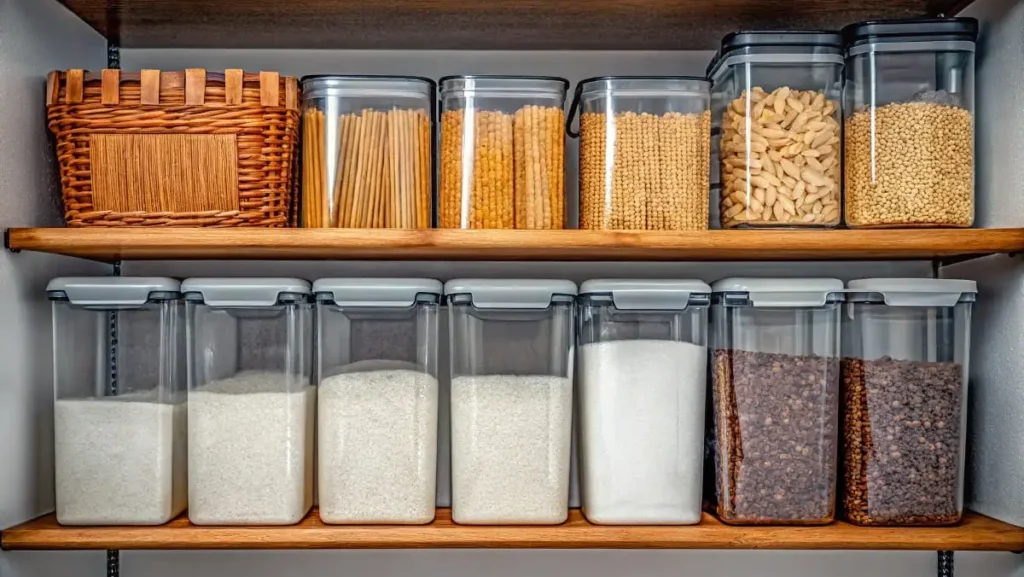
- Gluten-Free Grains & Starches: These are your lunch base builders!
- Quinoa: A protein-packed powerhouse perfect for salads and bowls.
- Brown Rice & White Rice: Versatile for bowls, stir-fries, and even cold rice salads.
- Gluten-Free Pasta: Look for pasta made from rice, corn, quinoa, or a blend. Great for pasta salads or warm pasta dishes (check labels to ensure it’s also dairy-free if needed for gluten free dairy free lunch recipes).
- Rice Noodles & Glass Noodles: Excellent for Asian-inspired salads and stir-fries.
- Gluten-Free Bread & Wraps: Keep your favorites on hand for quick sandwiches and wraps. Experiment with different brands to find textures you enjoy. (Consider dairy-free options if necessary).
- Canned Goods – Your Speedy Lunch Allies:
- Beans & Lentils: Chickpeas, black beans, kidney beans, lentils – these are protein and fiber superstars for salads, soups, and bowls. Choose no-salt-added or low-sodium options when possible.
- Canned Tuna, Salmon, or Chicken: In water or olive oil. Great for quick protein boosts in salads, wraps, or mixed with gluten-free mayo for a sandwich filling (ensure mayo is gluten-free and dairy-free if needed).
- Flavor Boosters & Condiments (Always Check Labels!):
- Gluten-Free Soy Sauce or Tamari: Tamari is often preferred as it’s typically certified gluten-free. Essential for Asian-inspired dishes and marinades.
- Mustard: Many mustards are naturally gluten-free and dairy-free, but always double-check labels. Dijon, yellow, and whole-grain mustards are great for dressings and sandwiches.
- Mayonnaise: Ensure it’s gluten-free (most are, but always check). Look for dairy-free versions if needed for gluten and dairy free lunch recipes.
- Vinegars: Balsamic, apple cider vinegar, red wine vinegar – perfect for salad dressings and marinades.
- Olive Oil & Avocado Oil: Healthy fats for cooking and dressings.
- Spices & Dried Herbs: Stock up on your favorites! Garlic powder, onion powder, paprika, cumin, oregano, basil, chili powder, etc. Spices are key to making gluten-free recipes for lunch exciting and flavorful.
- Nuts & Seeds: Almonds, walnuts, sunflower seeds, pumpkin seeds, chia seeds, flax seeds – add crunch, healthy fats, and nutrients to salads, bowls, and snacks.
- Dried Fruits: Raisins, cranberries, apricots – for a touch of sweetness and chewiness in salads and snacks.
Prep Like a Pro: Batch Cooking & Make-Ahead Strategies for Gluten-Free Lunches
The secret weapon of anyone who consistently eats healthy lunches? Prep ahead! Batch cooking and make-ahead strategies are game-changers for creating easy gluten-free lunch recipes, especially when you have busy weekdays. Investing a little time on the weekend (or one evening) can save you tons of time and stress during the week.
Batch Cooking Ideas
Batch cooking means cooking large quantities of basic ingredients that you can then mix and match throughout the week to create different lunches. Here are some great things to batch cook:
- Roast Vegetables: Roast a big pan of root vegetables (sweet potatoes, carrots, parsnips), broccoli, bell peppers, onions – toss them with olive oil, salt, pepper, and your favorite herbs. Roasted veggies are delicious warm or cold in salads, bowls, and wraps.
- Cook Grains: Cook a large batch of quinoa, brown rice, or lentils. These cooked grains can be the base for salads, bowls, or side dishes.
- Prepare a Salad Base: Wash and chop sturdy greens like romaine lettuce, kale, or spinach. Chop other salad veggies like cucumbers, carrots, and bell peppers. Store them separately in airtight containers in the fridge. Tip: Don’t dress your salad base until just before eating to keep it fresh.
- Hard-Boil Eggs: Hard-boiled eggs are a fantastic source of protein and are perfect for adding to salads or eating as a quick snack.
- Grill or Bake Protein: Grill or bake a batch of chicken breasts, tofu, or salmon. Shred or cube them for easy addition to salads, bowls, or wraps.
Make-Ahead Lunch Component Ideas
Beyond batch cooking whole ingredients, you can also prepare components of lunches in advance:
- Dressings & Sauces: Make a big batch of your favorite gluten-free salad dressing or sauce (like a lemon-herb vinaigrette, tahini dressing, or a spicy peanut sauce). Store in a jar in the fridge. Having dressings ready makes assembling salads and bowls super quick. (Ensure dairy-free if needed for gluten free dairy free lunch recipes).
- Grain Salads: Many grain salads (like quinoa salad or brown rice salad) actually taste better after they’ve sat for a day or two, as the flavors meld. Make a big batch on Sunday and portion it out for lunches.
- Soups & Stews: Soups and stews are excellent for make-ahead lunches. They reheat beautifully and are often even more flavorful the next day. Many soups are naturally gluten-free and dairy-free (like lentil soup, black bean soup, vegetable soup).
- Protein Salads (Tuna Salad, Chicken Salad, Chickpea Salad “Salad”): Prepare a batch of your favorite protein salad (using gluten-free and dairy-free mayo if needed) and store it in the fridge. Then, you can quickly scoop it into lettuce wraps, onto gluten-free bread or crackers, or serve it over a salad.
Gluten-Free Kitchen Hacks for Speedy Lunches
Even with prep work, sometimes you need a super-fast lunch solution. Here are some gluten-free kitchen hacks for those days when time is tight:
- Utilize Leftovers Creatively: Dinner leftovers are your best friend! Think about how you can repurpose last night’s dinner for lunch. Roasted chicken can become a chicken salad, leftover roasted vegetables can be tossed into a grain bowl, or leftover soup is an instant lunch.
- Embrace No-Cook Lunches: Salads, lettuce wraps, protein boxes, and “snack plates” require minimal to no cooking. Focus on assembling pre-cooked or ready-to-eat ingredients.
- Invest in Good Quality Gluten-Free Bread or Wraps: Having good gluten-free bread or wraps on hand opens up a world of quick sandwich and wrap possibilities. Look for brands that stay soft and don’t crumble easily.
- Pre-Chop Veggies on the Weekend: If you don’t want to batch cook fully, just pre-chop veggies like onions, peppers, celery, and carrots and store them in containers. This saves you time during the week when you’re making salads or quick meals.
- Use Kitchen Gadgets to Speed Things Up:
- Food Processor: Great for quickly chopping vegetables for salads or making dips and sauces.
- Rice Cooker or Instant Pot: Makes cooking grains like rice and quinoa hands-free and fast.
Delicious & Easy Gluten-Free Lunch Recipe Categories to Break Your Rut
Okay, enough talk about strategy! Let’s get to the food! To help you conquer that lunch rut, we’ve broken down delicious gluten-free lunch recipes into categories that are not only easy to make but also offer incredible variety. Get ready to be inspired!
Vibrant Gluten-Free Salads: Beyond Lettuce and Tomato
Forget those boring, bland salads that are just piles of lettuce with a few sad tomatoes. Gluten-free salads can be so much more! Think vibrant colors, exciting textures, and bold flavors. These aren’t just side salads; they’re satisfying and complete meals packed with nutrients and flavor. And the best part? Many are naturally gluten free dairy free lunch recipes or easily adaptable!
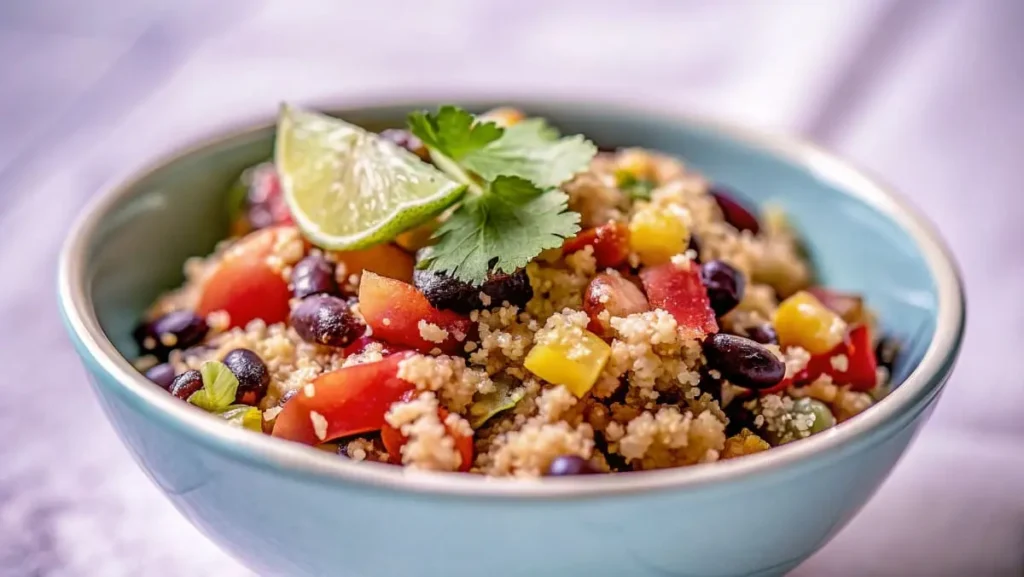
Recipe Idea 1: Quinoa & Black Bean Salad with Lime-Cilantro Dressing (Gluten-Free, Vegan Option)
This salad is a fiesta in a bowl! It’s packed with plant-based protein, fiber, and zesty flavors. Quinoa provides a hearty base, black beans add protein and creaminess, and the lime-cilantro dressing brings it all to life.
Yields: 4 servings
Prep Time: 20 minutes
Cook Time: 20 minutes (for quinoa)
Total Time: 40 minutes
Ingredients:
| Ingredient | Weight (grams) | Weight (ounces) | Notes |
| Quinoa | 200g | 7 oz | Uncooked, rinsed |
| Water or Vegetable Broth | 400ml | 14 fl oz | For cooking quinoa |
| Black Beans | 400g | 14 oz | Canned, rinsed and drained |
| Corn | 150g | 5 oz | Frozen or canned (drained if canned) |
| Red Onion | 50g | 1.75 oz | Finely diced |
| Red Bell Pepper | 100g | 3.5 oz | Diced |
| Cilantro | 30g | 1 oz | Fresh, chopped |
| Lime Juice | 60ml | 2 fl oz | Freshly squeezed (about 2-3 limes) |
| Olive Oil | 45ml | 1.5 fl oz | Extra virgin |
| Cumin | 5g | 1 tsp | Ground |
| Chili Powder | 3g | 1 tsp | Adjust to taste |
| Salt | 3g | 1/2 tsp | Or to taste |
| Black Pepper | 1g | 1/4 tsp | Or to taste |
Instructions:
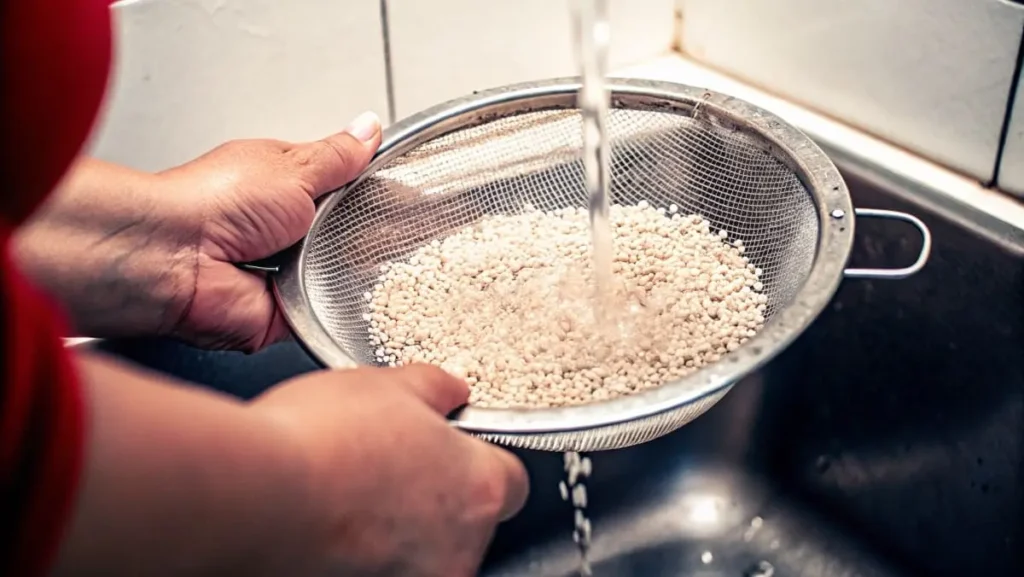
- Cook the Quinoa: Rinse quinoa thoroughly in a fine-mesh sieve under cold water. Combine rinsed quinoa with water or vegetable broth in a saucepan. Bring to a boil, then reduce heat to low, cover, and simmer for 15-20 minutes, or until all liquid is absorbed and quinoa is fluffy. Let it cool slightly.
- Prepare Vegetables: While quinoa is cooking, dice red onion and red bell pepper. If using frozen corn, thaw it slightly. If using canned corn, drain it. Chop fresh cilantro.
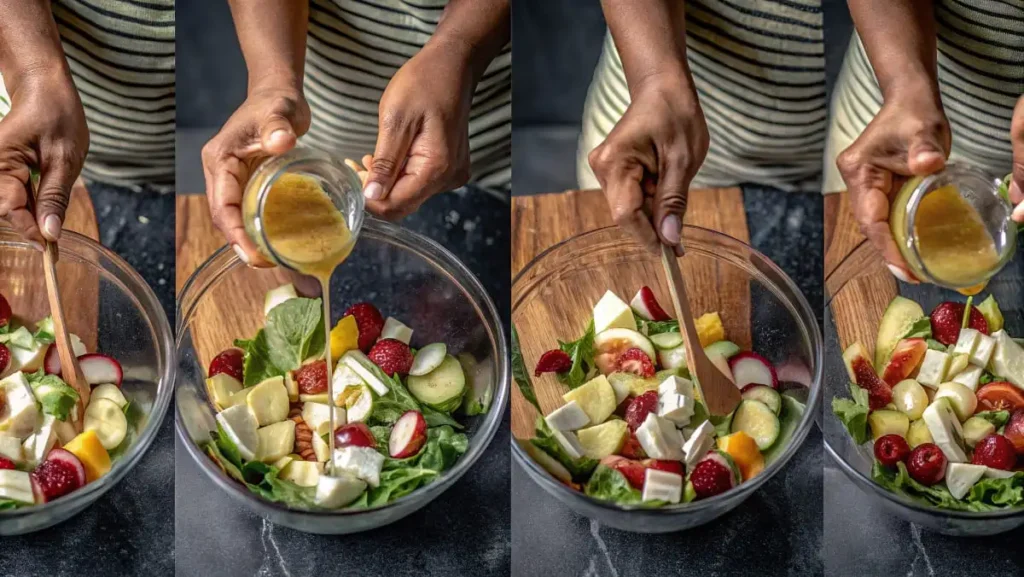
- Make the Dressing: In a small bowl, whisk together lime juice, olive oil, cumin, chili powder, salt, and black pepper.
- Assemble the Salad: In a large bowl, combine cooked quinoa, black beans, corn, red onion, red bell pepper, and chopped cilantro.
- Dress and Serve: Pour lime-cilantro dressing over the salad and toss gently to combine. Taste and adjust seasoning if needed. Serve at room temperature or chilled.
Chef’s Tips & Variations:
- Spice it up: Add a finely diced jalapeño pepper (remove seeds for less heat) to the salad for an extra kick.
- Add protein: For extra protein, add grilled chicken, grilled tofu, or crumbled feta cheese (omit feta for vegan/dairy-free).
- Make it ahead: This salad is great for meal prep! It can be made a day or two in advance and stored in the refrigerator. The flavors meld beautifully over time.
- Grain Swap: If you don’t have quinoa, you can substitute with cooked brown rice or couscous (ensure gluten-free couscous).
- Herb Variations: If you’re not a cilantro fan, try using fresh parsley or a combination of parsley and mint.
- Serving Suggestion: Serve this salad as a main course for lunch, or as a side dish with grilled chicken or fish. It’s also fantastic in gluten-free wraps!
Nutritional Information (per serving, approximate):
- Calories: 350-400
- Protein: 15g
- Fat: 15g
- Carbohydrates: 50g
Recipe Idea 2: Mediterranean Chickpea Salad with Lemon-Herb Vinaigrette (Gluten-Free, Vegan)
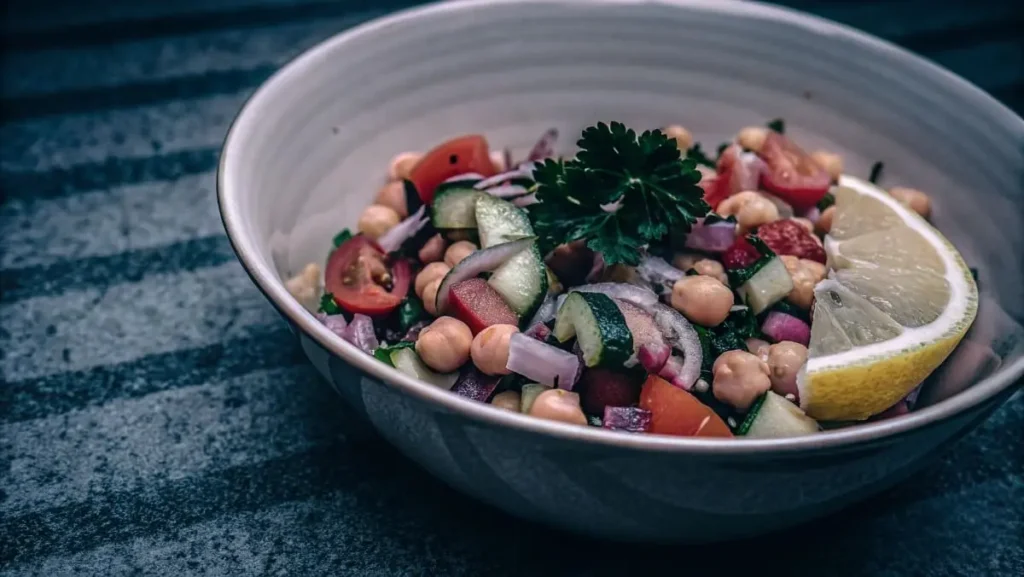
Bring the sunny flavors of the Mediterranean to your lunch break! This chickpea salad is bursting with fresh vegetables, herbs, and a zesty lemon vinaigrette. It’s a light yet satisfying lunch that’s naturally gluten-free and vegan.
Yields: 4 servings
Prep Time: 20 minutes
Cook Time: 0 minutes (no cooking required!)
Total Time: 20 minutes
Ingredients:
| Ingredient | Weight (grams) | Weight (ounces) | Notes |
| Chickpeas | 500g | 17.5 oz | Canned, rinsed and drained |
| Cucumber | 200g | 7 oz | English cucumber recommended, diced |
| Cherry Tomatoes | 250g | 9 oz | Halved or quartered if large |
| Red Onion | 60g | 2 oz | Finely diced |
| Kalamata Olives | 100g | 3.5 oz | Pitted, halved |
| Fresh Parsley | 30g | 1 oz | Chopped |
| Fresh Mint | 15g | 0.5 oz | Chopped |
| Lemon Juice | 60ml | 2 fl oz | Freshly squeezed (about 2-3 lemons) |
| Olive Oil | 60ml | 2 fl oz | Extra virgin |
| Dried Oregano | 3g | 1 tsp | |
| Salt | 3g | 1/2 tsp | Or to taste |
| Black Pepper | 1g | 1/4 tsp | Or to taste |
Instructions:
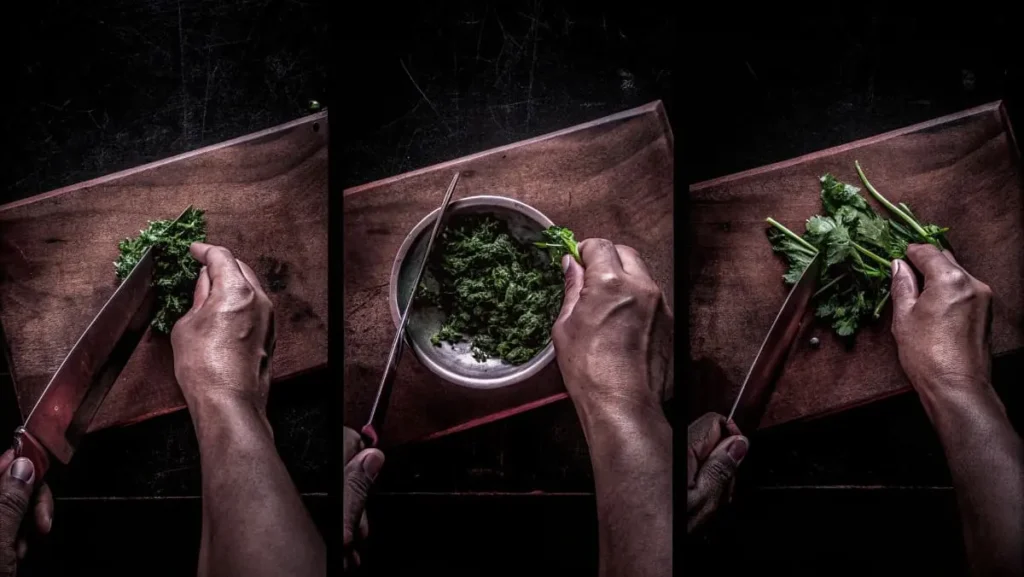
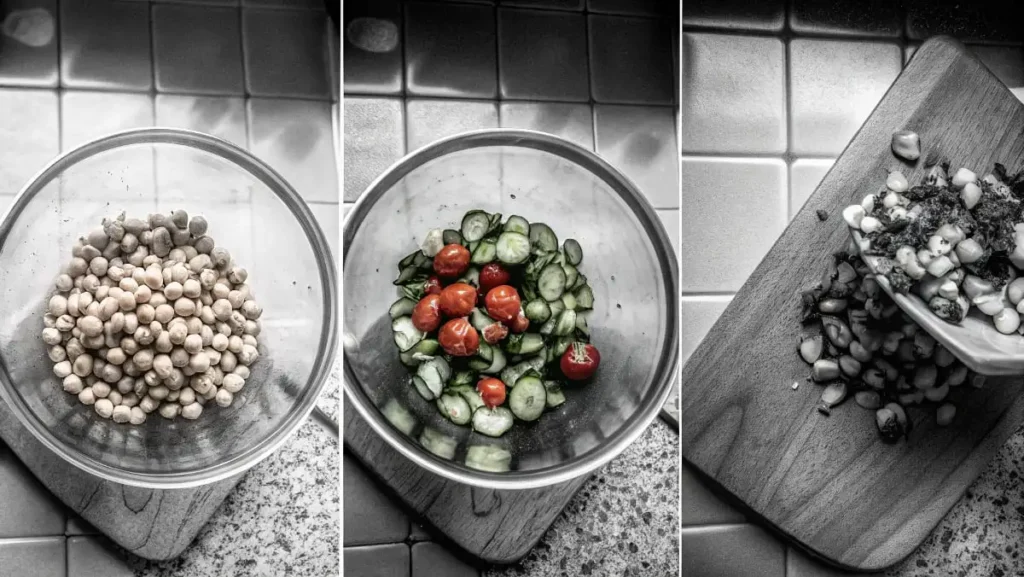
- Prepare Vegetables and Herbs: Dice cucumber, halve or quarter cherry tomatoes, and finely dice red onion. Pit and halve Kalamata olives. Chop fresh parsley and fresh mint.
- Make the Vinaigrette: In a small bowl, whisk together lemon juice, olive oil, dried oregano, salt, and black pepper.
- Assemble the Salad: In a large bowl, combine rinsed and drained chickpeas, diced cucumber, cherry tomatoes, red onion, Kalamata olives, chopped parsley, and chopped mint.
- Dress and Serve: Pour lemon-herb vinaigrette over the salad and toss gently to combine. Taste and adjust seasoning if needed. Serve immediately or chill for later. Chilling allows the flavors to meld even more.
Chef’s Tips & Variations:
- Add Feta (for non-vegan): For a non-vegan version, crumble in about 100g (3.5 oz) of feta cheese for salty, tangy flavor.
- Boost the Protein: Add grilled or baked chicken, or grilled halloumi cheese (for vegetarian but not vegan) for extra protein.
- Make it Spicy: Add a pinch of red pepper flakes to the vinaigrette for a subtle kick.
- Vegetable Variations: Feel free to add other Mediterranean vegetables like bell peppers (any color), artichoke hearts (canned or marinated, drained), or sun-dried tomatoes (oil-packed, drained and chopped).
- Grain Addition: For a heartier salad, add cooked quinoa, couscous (gluten-free), or brown rice.
- Make it Ahead: This salad is fantastic for meal prep! It holds up well in the refrigerator for 2-3 days. The flavors actually improve as it sits.
Nutritional Information (per serving, approximate):
- Calories: 300-350
- Protein: 10g
- Fat: 20g
- Carbohydrates: 30g
Warm & Comforting Gluten-Free Soups & Stews for Lunch
When the weather gets cooler, or you just crave something cozy and comforting, soups and stews are the perfect gluten-free lunch recipes. They are often naturally gluten-free, easy to make ahead, and incredibly satisfying. Plus, they are a fantastic way to pack in vegetables and nutrients. And guess what? Delicious creamy soups are still possible even if you’re looking for gluten free dairy free lunch recipes!
Recipe Idea 3: Creamy Tomato Soup (Dairy-Free & Gluten-Free, Vegan)
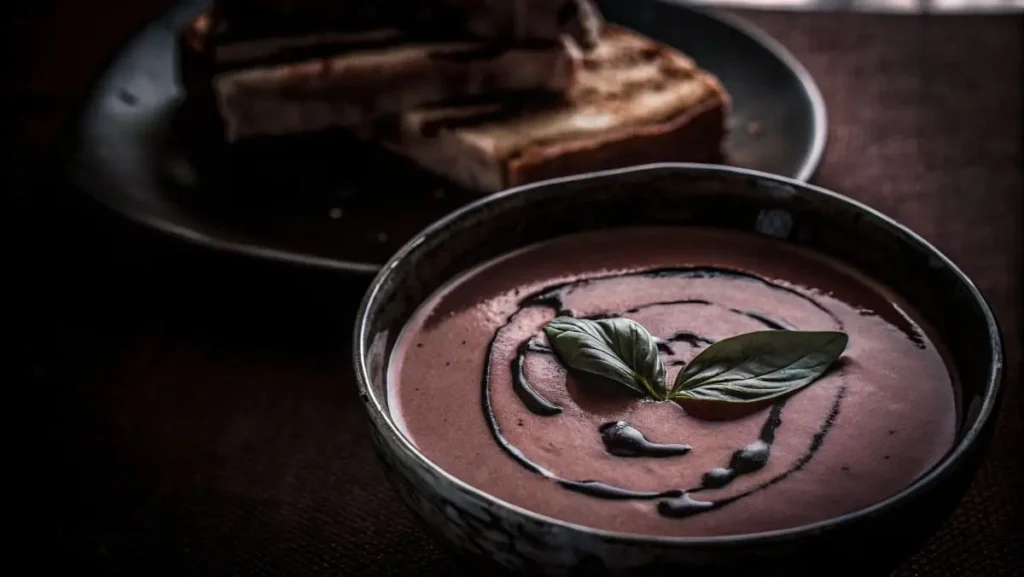
This isn’t your canned tomato soup! This homemade version is rich, flavorful, and unbelievably creamy, all without any dairy. The secret? Roasted tomatoes and a touch of coconut milk for lusciousness. It’s a classic comfort food made gluten-free and vegan.
Yields: 4 servings
Prep Time: 15 minutes
Cook Time: 45 minutes
Total Time: 1 hour
Ingredients:
| Ingredient | Weight (grams) | Weight (ounces) | Notes |
| Roma Tomatoes | 1 kg | 2.2 lbs | About 8-10 medium tomatoes, halved |
| Onion | 150g | 5 oz | Roughly chopped |
| Garlic | 10g | 2-3 cloves | Peeled |
| Olive Oil | 45ml | 1.5 fl oz | Extra virgin |
| Vegetable Broth | 750ml | 25 fl oz | Low sodium |
| Coconut Milk | 200ml | 7 fl oz | Full-fat, from a can, well-stirred |
| Dried Basil | 2g | 1 tsp | |
| Dried Oregano | 2g | 1 tsp | |
| Salt | 4g | ¾ tsp | Or to taste |
| Black Pepper | 1g | ¼ tsp | Or to taste |
| Fresh Basil | 15g | 0.5 oz | For garnish, chopped (optional) |
Instructions:
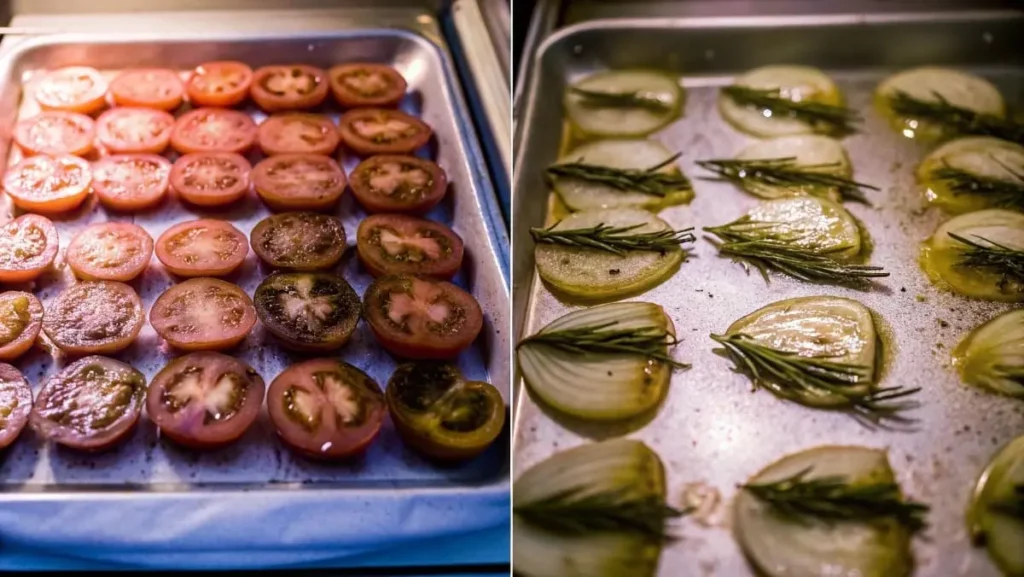
- Roast the Vegetables: Preheat oven to 200°C (400°F). Toss halved tomatoes, chopped onion, and garlic cloves with olive oil, salt, and pepper on a baking sheet. Roast for 35-40 minutes, or until tomatoes are softened and slightly caramelized.
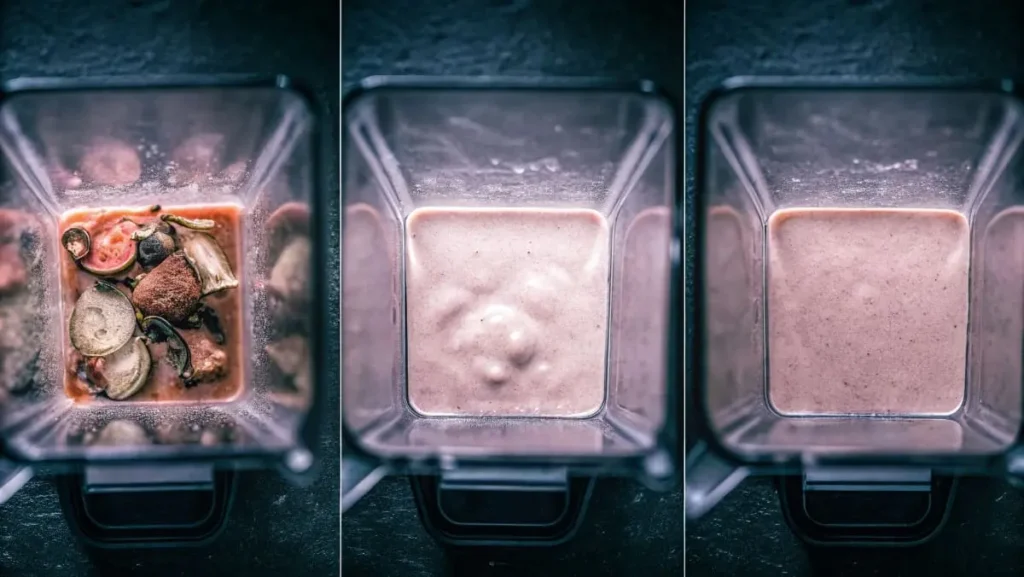
- Blend the Soup: Transfer roasted vegetables to a blender (or use an immersion blender). Add vegetable broth, dried basil, and dried oregano. Blend until completely smooth and creamy. Be careful when blending hot liquids; vent the blender lid and start on low speed.
- Simmer and Finish: Pour blended soup into a saucepan. Stir in coconut milk and heat gently over medium heat. Do not boil. Simmer for 5-10 minutes to allow flavors to meld. Taste and adjust seasoning with salt and pepper if needed.
- Serve: Ladle hot tomato soup into bowls. Garnish with fresh basil, a swirl of olive oil, or gluten-free croutons (optional).
Chef’s Tips & Variations:
- Roasted Garlic Boost: Roast a whole head of garlic alongside the tomatoes for even deeper flavor. Squeeze roasted garlic cloves into the soup before blending.
- Spice it Up: Add a pinch of red pepper flakes while roasting the vegetables or a dash of hot sauce to the finished soup for a spicy kick.
- Herb Infusion: Add fresh thyme sprigs or bay leaves to the roasting vegetables for extra herbal notes. Remove before blending.
- Sweetness Adjustment: If your tomatoes are very acidic, add a teaspoon of maple syrup or coconut sugar to balance the flavors.
- Gluten-Free Grilled Cheese Pairing: Serve with a gluten-free grilled cheese sandwich for a classic and comforting lunch combination. Use dairy-free cheese for a completely vegan meal.
Nutritional Information (per serving, approximate):
- Calories: 200-250
- Protein: 5g
- Fat: 15g
- Carbohydrates: 20g
Recipe Idea 4: Hearty Lentil Soup with Vegetables (Gluten-Free, Vegan)
This classic lentil soup is the definition of comfort food. It’s packed with protein, fiber, and loads of vegetables, making it a super nutritious and satisfying gluten-free lunch recipe. It’s also naturally vegan and incredibly budget-friendly. Perfect for a chilly day or anytime you need a nourishing and warming meal.
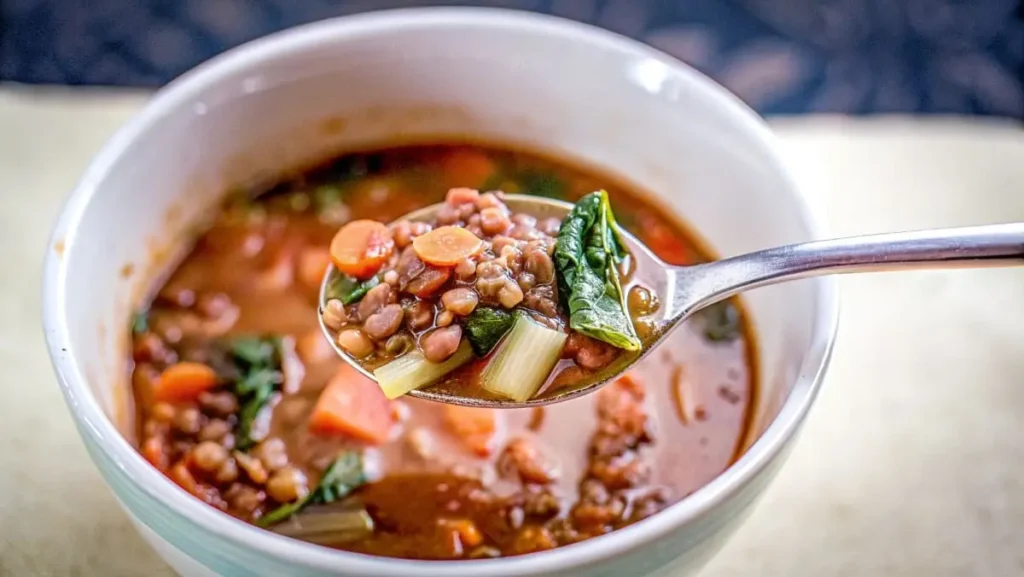
Yields: 6 servings
Prep Time: 20 minutes
Cook Time: 45 minutes
Total Time: 1 hour 5 minutes
Ingredients:
| Ingredient | Weight (grams) | Weight (ounces) | Notes |
| Brown or Green Lentils | 250g | 9 oz | Uncooked, rinsed |
| Onion | 150g | 5 oz | Diced |
| Carrots | 150g | 5 oz | Diced |
| Celery Stalks | 100g | 3.5 oz | Diced |
| Garlic | 7g | 2 cloves | Minced |
| Olive Oil | 30ml | 1 fl oz | Extra virgin |
| Vegetable Broth | 1.5 Liters | 50 fl oz | Low sodium |
| Diced Tomatoes | 400g | 14 oz | Canned |
| Bay Leaf | 1 | 1 leaf | |
| Dried Thyme | 2g | 1 tsp | |
| Salt | 4g | ¾ tsp | Or to taste |
| Black Pepper | 1g | ¼ tsp | Or to taste |
| Spinach or Kale | 100g | 3.5 oz | Roughly chopped (optional, added at end) |
| Lemon Juice | 30ml | 1 fl oz | Freshly squeezed, for serving (optional) |
Instructions:
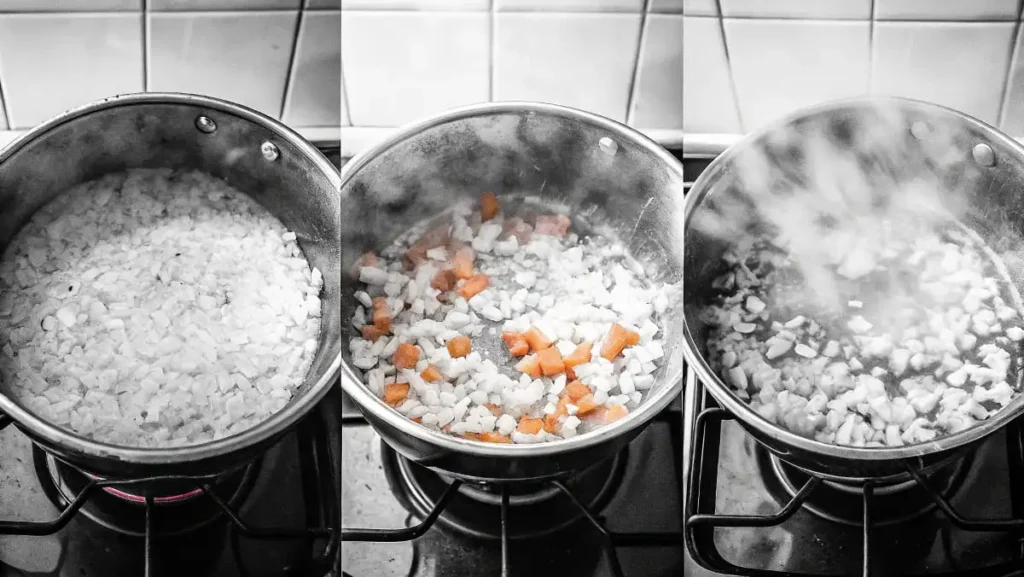
- Sauté Vegetables: Heat olive oil in a large pot or Dutch oven over medium heat. Add diced onion, carrots, and celery. Sauté for 5-7 minutes, until softened. Add minced garlic and cook for another minute until fragrant.
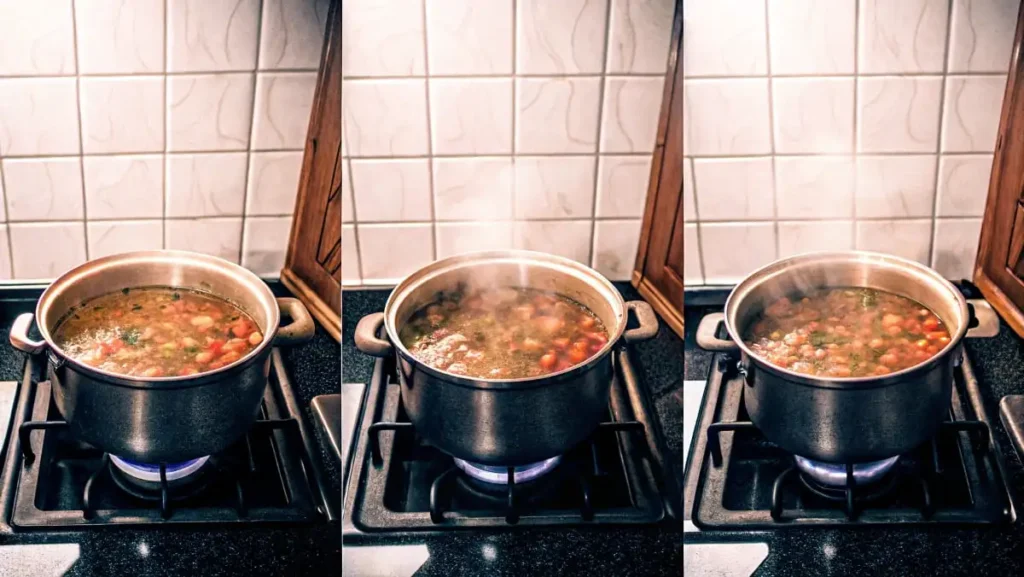
- Add Lentils and Liquids: Stir in rinsed lentils, vegetable broth, and diced tomatoes (undrained). Add bay leaf and dried thyme. Bring to a boil, then reduce heat to low, cover, and simmer for 30-40 minutes, or until lentils are tender.
- Simmer and Thicken: Remove bay leaf. If you prefer a slightly thicker soup, you can use an immersion blender to partially blend a portion of the soup (optional).
- Add Greens (Optional): If using spinach or kale, stir it in during the last 5 minutes of cooking until wilted.
- Season and Serve: Season soup with salt and black pepper to taste. Serve hot, garnished with a squeeze of fresh lemon juice if desired.
Chef’s Tips & Variations:
- Smoked Paprika for Depth: Add 1 teaspoon of smoked paprika along with the thyme for a smoky flavor.
- Spice it Up: Add a pinch of red pepper flakes or a diced jalapeño pepper (with seeds removed for less heat) to the sautéing vegetables for a spicy lentil soup.
- Herb Variations: Try adding fresh rosemary or oregano instead of thyme, or a combination of herbs.
- Protein Boost: Add cooked sausage (ensure gluten-free), chicken, or chickpeas for extra protein.
- Make it Creamier (Non-Vegan Variation): Stir in a swirl of heavy cream or yogurt at the end for a creamier texture (omit for vegan/dairy-free).
- Make it Ahead: Lentil soup is even better the next day! It’s perfect for making ahead and reheating for lunches throughout the week. It’s a fantastic make-ahead gluten free lunch recipe for work.
Nutritional Information (per serving, approximate):
- Calories: 250-300
- Protein: 15g
- Fat: 8g
- Carbohydrates: 40g
Gluten-Free Wraps & Sandwiches: Reinventing Lunch Classics
Think you can’t enjoy wraps and sandwiches on a gluten-free diet? Think again! With the rise of delicious gluten-free breads and wraps, you can enjoy these lunch staples. The key is to get creative with your fillings and choose high-quality gluten-free bread or wraps that hold up well and taste great. These are perfect for quick and portable gluten free lunch recipes for work or a speedy meal at home.
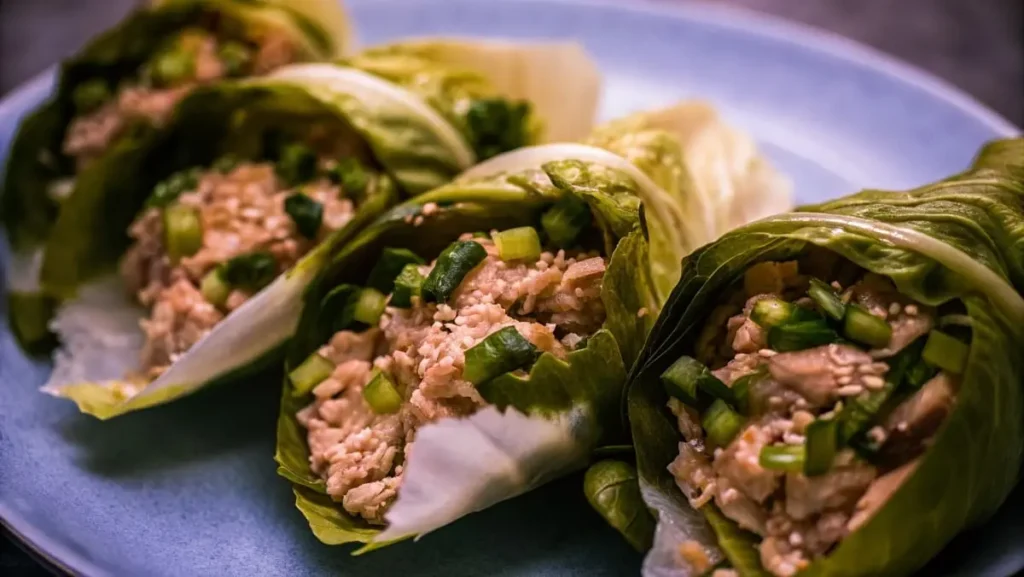
Recipe Idea 5: Spicy Tuna Salad Lettuce Wraps (Gluten-Free, Dairy-Free Option)
Take tuna salad to a whole new level with a spicy kick and a refreshing lettuce wrap instead of bread. This is a light, flavorful, and satisfying gluten-free lunch recipe that’s also easily made dairy-free.
Yields: 4 servings
Prep Time: 15 minutes
Cook Time: 0 minutes
Total Time: 15 minutes
Ingredients:
| Ingredient | Weight (grams) | Weight (ounces) | Notes |
| Canned Tuna | 340g | 12 oz | In water, drained |
| Mayonnaise | 60g | ¼ cup | Gluten-free (dairy-free if needed) |
| Sriracha Sauce | 15ml | 1 tbsp | Or other hot sauce, adjust to taste |
| Lime Juice | 15ml | 1 tbsp | Freshly squeezed |
| Red Onion | 30g | 1 oz | Finely diced |
| Celery | 50g | 1.75 oz | Finely diced |
| Green Onions | 30g | 1 oz | Thinly sliced, for garnish |
| Lettuce Leaves | 200g | 7 oz | Large, crisp leaves (e.g., romaine, butter lettuce) |
| Sesame Seeds | 5g | 1 tsp | Toasted, for garnish (optional) |
Instructions:
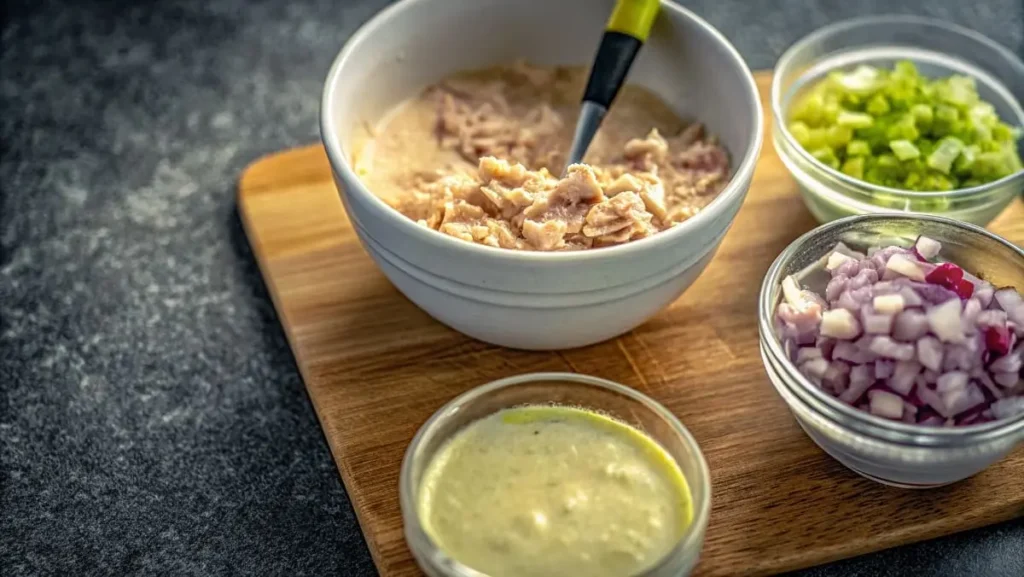
- Make Spicy Tuna Salad: In a medium bowl, combine drained tuna, mayonnaise (use dairy-free mayo for dairy-free option), sriracha sauce, lime juice, diced red onion, and diced celery. Stir well to combine. Taste and adjust sriracha and lime juice to your preference.
- Prepare Lettuce Wraps: Wash and dry lettuce leaves. Choose large, sturdy leaves that will hold the tuna salad well.
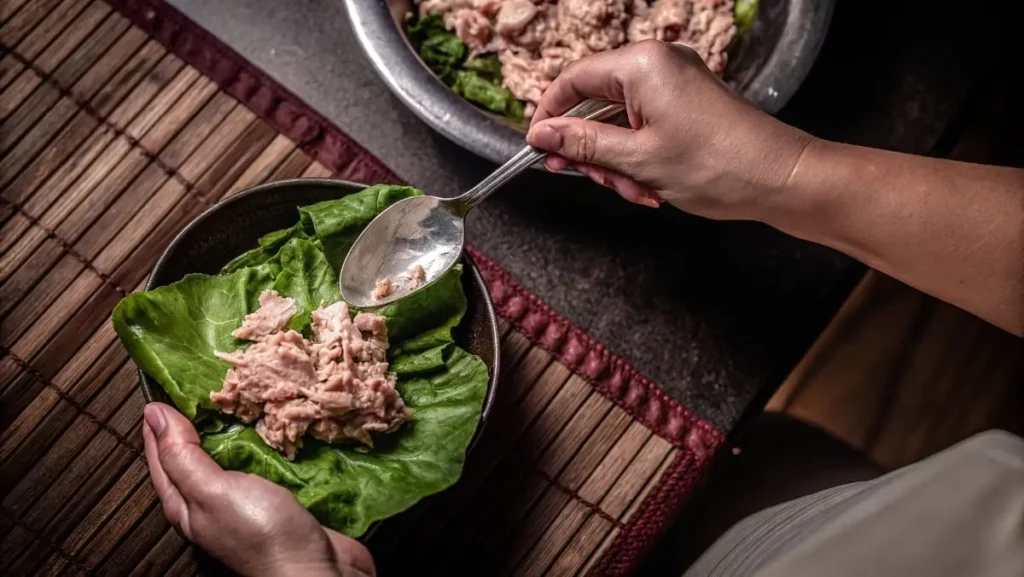
- Assemble Lettuce Wraps: Spoon spicy tuna salad into lettuce leaves. Garnish with sliced green onions and toasted sesame seeds (if using).
- Serve Immediately: Enjoy your spicy tuna salad lettuce wraps right away for the best texture.
Chef’s Tips & Variations:
- Spice Level Control: Adjust the amount of sriracha sauce to control the spice level. Start with less and add more to taste. You can also use other hot sauces like gochujang or chili garlic sauce.
- Add Avocado: Dice half an avocado and gently fold it into the tuna salad for extra creaminess and healthy fats.
- Vegetable Boost: Add shredded carrots, diced bell pepper, or chopped cucumber to the tuna salad for extra crunch and nutrients.
- Herb Freshness: Stir in chopped fresh cilantro or parsley for added freshness.
- Make it Ahead (Components): You can make the tuna salad ahead of time and store it in the refrigerator for up to a day. Assemble the lettuce wraps just before serving to prevent the lettuce from wilting.
Nutritional Information (per serving, approximate):
- Calories: 200-250
- Protein: 20g
- Fat: 12g
- Carbohydrates: 5g
Recipe Idea 6: Roasted Vegetable & Hummus Gluten-Free Wrap (Gluten-Free, Vegan)
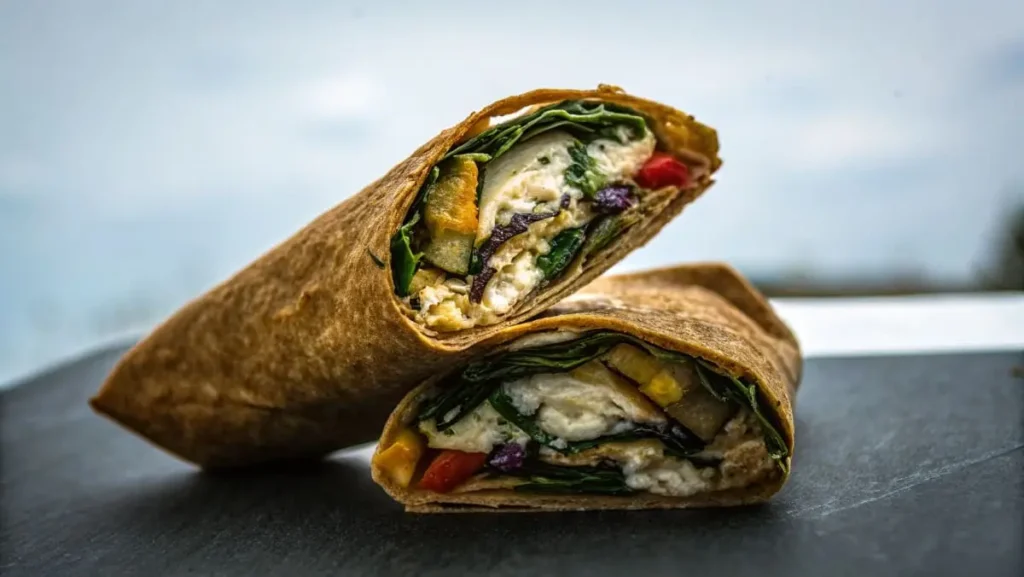
This wrap is a vegetarian and vegan delight, packed with flavorful roasted vegetables and creamy hummus. It’s a hearty and satisfying gluten-free lunch recipe that’s easy to customize with your favorite vegetables.
Yields: 4 wraps
Prep Time: 20 minutes
Cook Time: 30 minutes
Total Time: 50 minutes
Ingredients:
| Ingredient | Weight (grams) | Weight (ounces) | Notes |
| Bell Peppers | 300g | 10.5 oz | Assorted colors, sliced |
| Zucchini | 200g | 7 oz | Sliced |
| Red Onion | 100g | 3.5 oz | Sliced |
| Olive Oil | 30ml | 1 fl oz | Extra virgin |
| Dried Oregano | 2g | 1 tsp | |
| Salt | 3g | ½ tsp | Or to taste |
| Black Pepper | 1g | ¼ tsp | Or to taste |
| Gluten-Free Wraps | 4 | 4 wraps | Large size |
| Hummus | 200g | 7 oz | Store-bought or homemade, gluten-free |
| Spinach | 100g | 3.5 oz | Fresh spinach leaves |
Instructions:
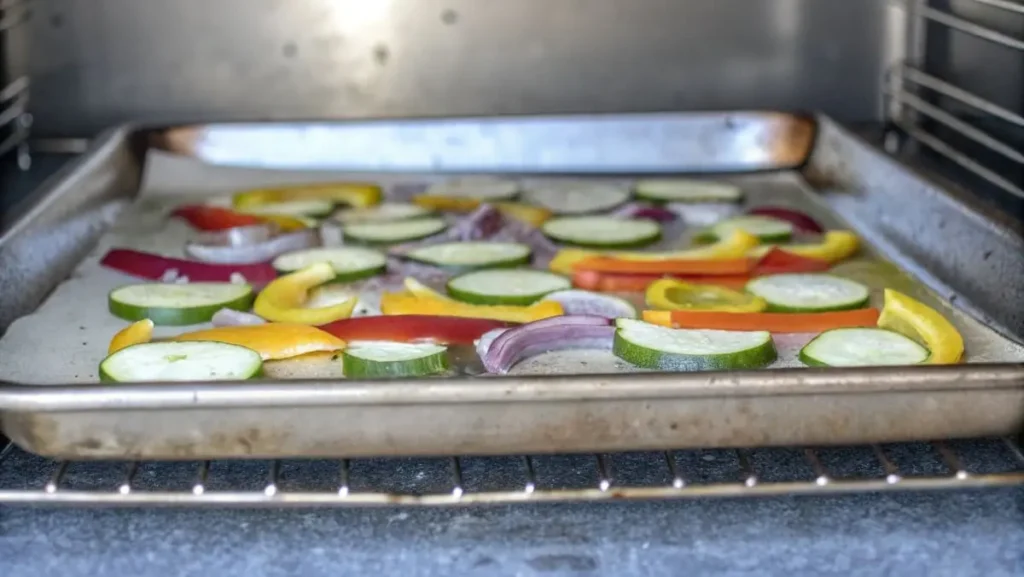
- Roast Vegetables: Preheat oven to 200°C (400°F). Toss sliced bell peppers, zucchini, and red onion with olive oil, dried oregano, salt, and black pepper on a baking sheet. Roast for 25-30 minutes, or until vegetables are tender and slightly caramelized.
- Warm Wraps (Optional): Warm gluten-free wraps according to package directions. This makes them more pliable and less likely to crack.
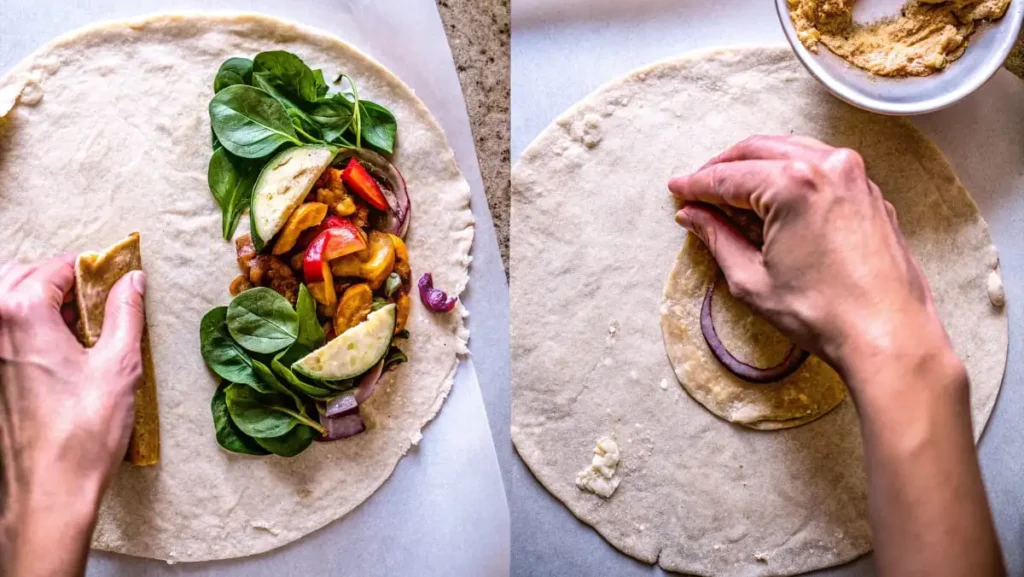
- Assemble Wraps: Spread a generous layer of hummus on each gluten-free wrap.
- Fill Wraps: Layer roasted vegetables and fresh spinach leaves over the hummus.
- Wrap and Serve: Fold in the sides of the wrap and roll it up tightly. Cut in half if desired. Serve immediately or pack for lunch.
Chef’s Tips & Variations:
- Vegetable Variations: Use any combination of your favorite roasting vegetables. Eggplant, broccoli, carrots, sweet potatoes, and asparagus all work well.
- Hummus Flavors: Experiment with different flavors of hummus, such as roasted red pepper hummus, garlic hummus, or spinach and artichoke hummus.
- Add Cheese (Non-Vegan Option): For a non-vegan version, add crumbled feta cheese or goat cheese to the wrap for extra flavor.
- Protein Boost: Add grilled chicken, chickpeas, or falafel for extra protein.
- Spice it Up: Add a drizzle of hot sauce or a sprinkle of red pepper flakes to the roasted vegetables or hummus for a spicy kick.
- Make it Ahead (Components): Roast the vegetables ahead of time and store them in the refrigerator. You can also prepare the hummus in advance. Assemble the wraps just before serving or packing for lunch.
Nutritional Information (per wrap, approximate):
- Calories: 350-400
- Protein: 12g
- Fat: 18g
- Carbohydrates: 45g
Gluten-Free Lunch Bowls: The Customizable & Trendy Choice
Lunch bowls are incredibly versatile and perfect for easy gluten-free lunch recipes. They are essentially deconstructed salads or meals in a bowl, allowing you to mix and match grains, proteins, vegetables, and sauces to create endless variations. Bowls are fantastic for meal prep because you can prepare components ahead and assemble them quickly at lunchtime. They are also great for using up leftovers!
Recipe Idea 7: Chicken & Quinoa Power Bowl with Roasted Sweet Potatoes (Gluten-Free, Dairy-Free)
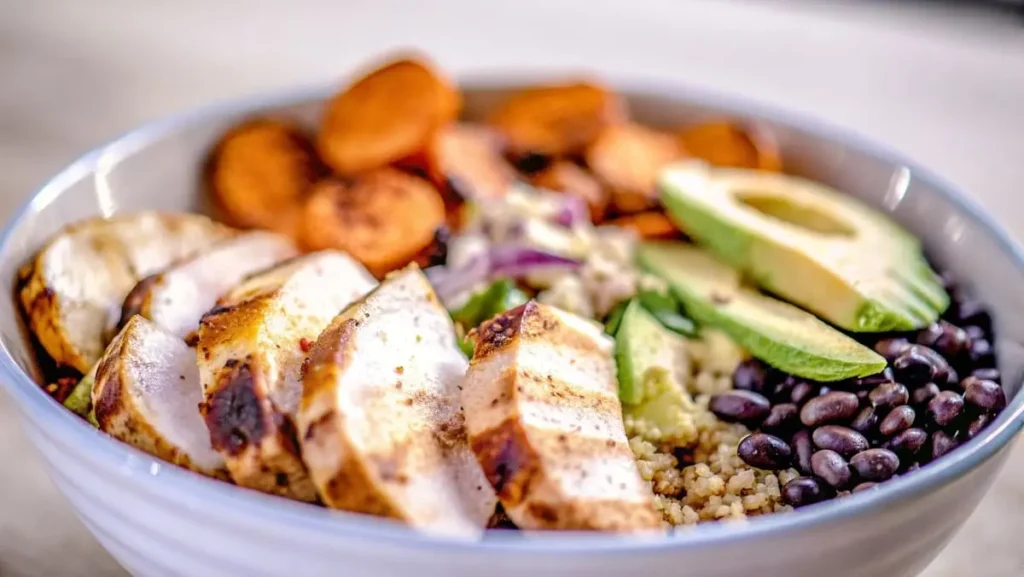
This power bowl is a nutritional powerhouse, packed with protein, healthy carbs, and vitamins. Roasted sweet potatoes provide sweetness and fiber, quinoa adds protein and substance, and grilled chicken provides lean protein. It’s a complete and satisfying gluten-free lunch recipe that will keep you energized all afternoon.
Yields: 4 servings
Prep Time: 25 minutes
Cook Time: 40 minutes
Total Time: 1 hour 5 minutes
Ingredients:
| Ingredient | Weight (grams) | Weight (ounces) | Notes |
| Sweet Potatoes | 600g | 1.3 lbs | Cubed |
| Olive Oil | 45ml | 1.5 fl oz | Extra virgin, divided |
| Chili Powder | 3g | 1 tsp | |
| Cumin | 2g | ¾ tsp | |
| Salt | 3g | ½ tsp | Or to taste, divided |
| Black Pepper | 1g | ¼ tsp | Or to taste, divided |
| Quinoa | 200g | 7 oz | Uncooked, rinsed |
| Water or Chicken Broth | 400ml | 14 fl oz | For cooking quinoa |
| Chicken Breasts | 500g | 1.1 lbs | Boneless, skinless |
| Paprika | 2g | ¾ tsp | |
| Garlic Powder | 2g | ¾ tsp | |
| Avocado | 200g | 7 oz | 1-2 avocados, sliced or diced |
| Black Beans | 200g | 7 oz | Canned, rinsed and drained |
| Corn | 150g | 5 oz | Frozen or canned (drained if canned) |
| Lime Wedges | 2-3 | For serving | |
| Cilantro | 30g | 1 oz | Fresh, chopped, for garnish (optional) |
| Dressing of Choice | 120ml | ½ cup | e.g., Lime-Cilantro Vinaigrette, Tahini Dressing |
Instructions:
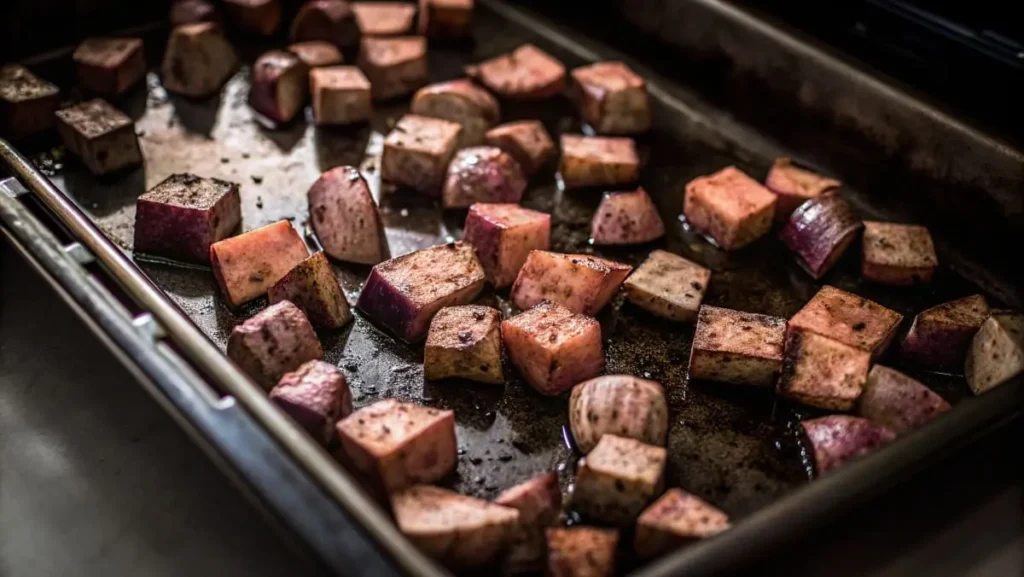
- Roast Sweet Potatoes: Preheat oven to 200°C (400°F). Toss cubed sweet potatoes with 2 tablespoons olive oil, chili powder, cumin, ¼ teaspoon salt, and ¼ teaspoon black pepper on a baking sheet. Roast for 25-30 minutes, or until tender and slightly caramelized, flipping halfway through.
- Cook Quinoa: While sweet potatoes are roasting, rinse quinoa. Combine quinoa with water or chicken broth in a saucepan. Bring to a boil, then reduce heat, cover, and simmer for 15-20 minutes, or until liquid is absorbed and quinoa is fluffy.
- Grill Chicken: While quinoa is cooking, prepare chicken. Rub chicken breasts with remaining 1 tablespoon olive oil, paprika, garlic powder, ¼ teaspoon salt, and ¼ teaspoon black pepper. Grill or pan-sear chicken until cooked through, about 5-7 minutes per side. Let rest for a few minutes, then slice or cube. Alternatively, use pre-cooked or rotisserie chicken for a quicker option.
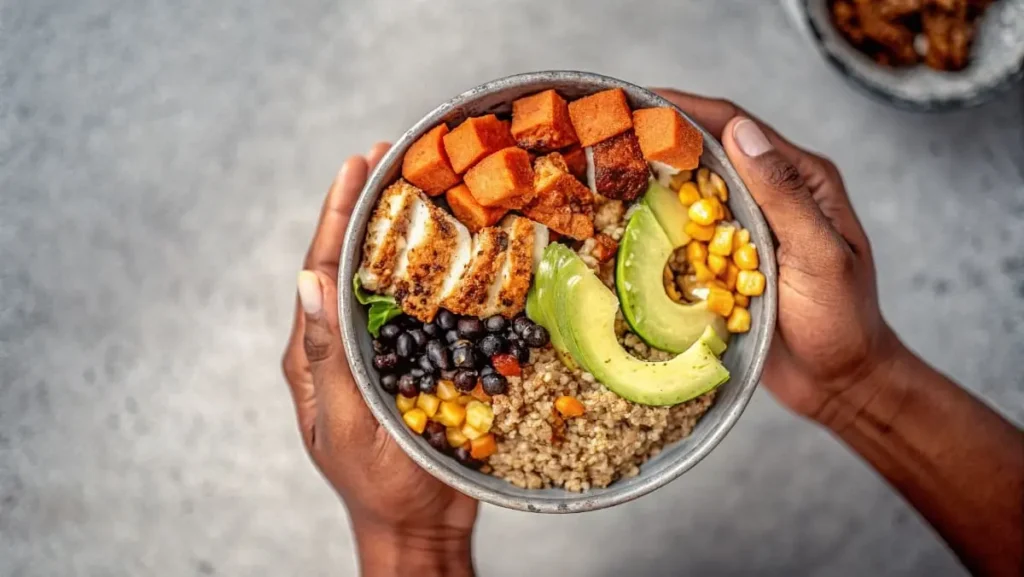
- Assemble Bowls: Divide cooked quinoa among bowls. Top with roasted sweet potatoes, grilled chicken, sliced avocado, black beans, and corn.
- Dress and Serve: Drizzle dressing of your choice over the bowls. Garnish with fresh cilantro and serve with lime wedges.
Chef’s Tips & Variations:
- Protein Swaps: Substitute chicken with grilled tofu, chickpeas, black beans, or lentils for a vegetarian or vegan version.
- Grain Variations: Use brown rice, couscous (gluten-free), or farro (ensure gluten-free) instead of quinoa.
- Vegetable Add-ins: Add roasted broccoli, bell peppers, Brussels sprouts, or kale to the bowls.
- Dressing Options: Lime-cilantro vinaigrette, tahini dressing, avocado dressing, or a simple lemon vinaigrette all work well.
- Make it Ahead (Components): Roast sweet potatoes, cook quinoa, and grill chicken ahead of time. Store components separately in the refrigerator and assemble bowls just before serving. This is an excellent gluten free lunch recipe for work meal prep option.
Nutritional Information (per serving, approximate):
- Calories: 500-550
- Protein: 35g
- Fat: 20g
- Carbohydrates: 55g
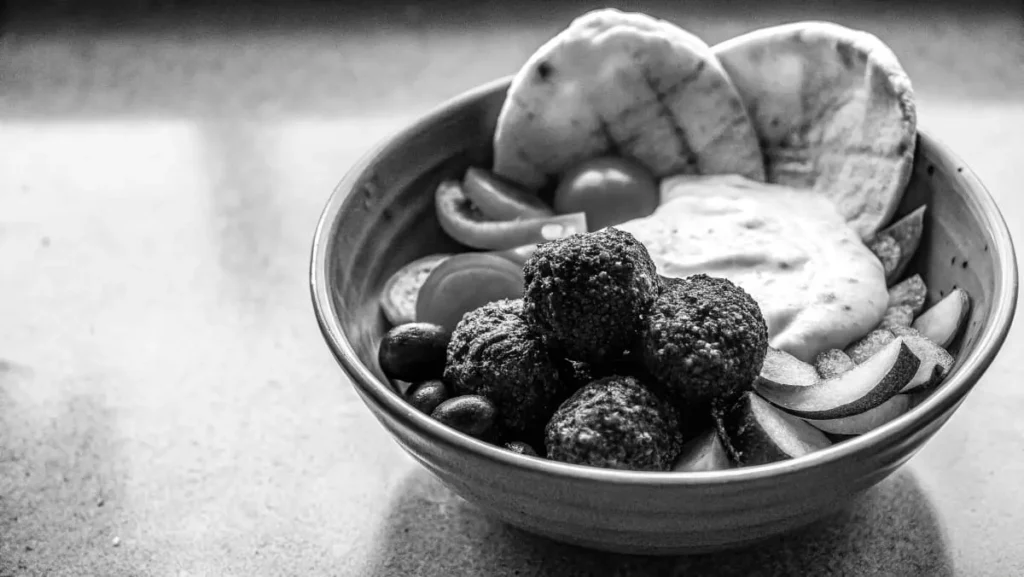
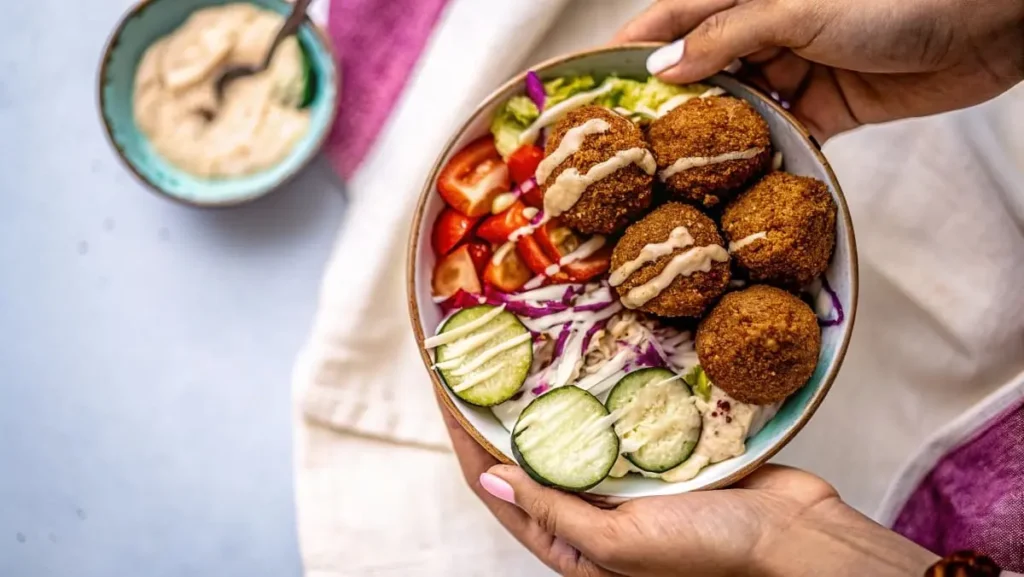
Recipe Idea 8: Mediterranean Falafel Bowl (Gluten-Free, Vegan Option)
Transport yourself to the Mediterranean with this flavorful falafel bowl. Crispy falafel, creamy hummus, fresh vegetables, and a tangy tahini dressing create a vibrant and satisfying gluten-free lunch recipe. Ensure you use certified gluten-free falafel or make your own to be certain it’s gluten-free.
Yields: 4 servings
Prep Time: 30 minutes (if making falafel from scratch, less if using pre-made)
Cook Time: 20 minutes (if making falafel)
Total Time: 50 minutes (if making falafel), 25 minutes (if using pre-made)
Ingredients:
| Ingredient | Weight (grams) | Weight (ounces) | Notes |
| Falafel | 400g | 14 oz | Gluten-free, store-bought or homemade |
| Quinoa or Brown Rice | 200g | 7 oz | Cooked |
| Hummus | 200g | 7 oz | Gluten-free, store-bought or homemade |
| Cucumber | 200g | 7 oz | Diced |
| Cherry Tomatoes | 250g | 9 oz | Halved or quartered if large |
| Red Onion | 50g | 1.75 oz | Thinly sliced |
| Kalamata Olives | 100g | 3.5 oz | Pitted, halved |
| Tahini Dressing | 120ml | ½ cup | Store-bought or homemade, gluten-free |
| Fresh Parsley | 30g | 1 oz | Chopped, for garnish |
| Gluten-Free Pita Bread | 4 | 4 pitas | Optional, warmed, for serving |
Instructions:
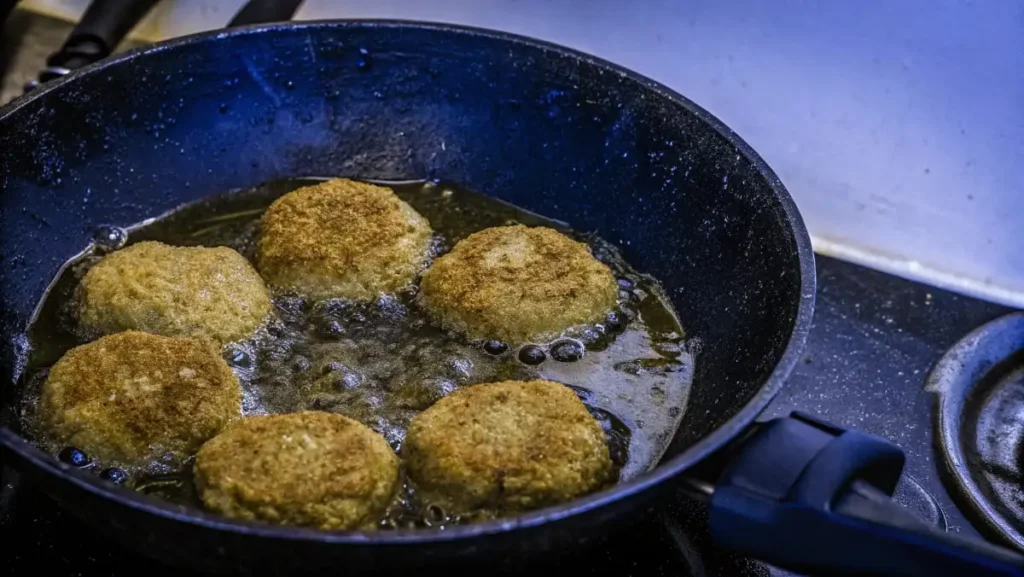
- Cook Falafel: Prepare falafel according to package directions if using store-bought. If making from scratch, follow a gluten-free falafel recipe and cook them by frying, baking, or air-frying until golden brown and crispy. Ensure your falafel is certified gluten-free, as some recipes may use wheat flour as a binder.
- Prepare Grains and Vegetables: Cook quinoa or brown rice according to package directions. Dice cucumber, halve or quarter cherry tomatoes, and thinly slice red onion. Pit and halve Kalamata olives.
- Assemble Bowls: Divide cooked quinoa or brown rice among bowls. Top with hummus, falafel balls, diced cucumber, cherry tomatoes, red onion, and Kalamata olives.
- Dress and Garnish: Drizzle tahini dressing generously over the bowls. Garnish with chopped fresh parsley.
- Serve: Serve immediately. Warm gluten-free pita bread on the side is optional for scooping up the bowl ingredients.
Chef’s Tips & Variations:
- Homemade Falafel: For the best flavor, consider making your own gluten-free falafel from scratch. There are many recipes available online using chickpea flour or gluten-free breadcrumbs as binders.
- Spice it Up: Add a drizzle of hot sauce or a sprinkle of red pepper flakes to the falafel or tahini dressing for a spicy kick.
- Vegetable Variations: Add roasted red peppers, grilled eggplant, or pickled turnips to the bowls for more Mediterranean flavors.
- Herb Variations: Use fresh mint or dill in addition to or instead of parsley.
- Dressing Options: Lemon-herb vinaigrette or a yogurt-based dressing (dairy-free yogurt for vegan) can also be used instead of tahini dressing.
- Make it Ahead (Components): Cook grains, prepare falafel (if making from scratch), and chop vegetables ahead of time. Store components separately and assemble bowls just before serving.
Nutritional Information (per serving, approximate – varies based on falafel recipe):
- Calories: 450-550
- Protein: 20-25g
- Fat: 25-30g
- Carbohydrates: 50-60g
Discover also: Mediterranean Quinoa Salad with Lemon-Herb Vinaigrette
Conquer Your Lunch Rut & Embrace Gluten-Free Deliciousness!
You’ve made it! You’ve journeyed through a world of vibrant salads, comforting soups, reinvented wraps and sandwiches, and customizable bowls – all completely gluten-free! No more excuses for boring lunches. No more feeling restricted by your dietary needs.
Recap & Encouragement
Remember, breaking out of a lunch rut and enjoying delicious gluten-free lunch recipes is achievable. It’s about:
- Stocking your pantry with gluten-free essentials.
- Mastering prep-ahead strategies like batch cooking and component prepping.
- Getting creative with flavors and ingredients.
- Embracing variety – salads, soups, wraps, bowls… the possibilities are endless!
Gluten-free eating doesn’t have to be limiting. It can be an exciting opportunity to explore new flavors, experiment with fresh ingredients, and discover a whole new world of delicious food. We hope these recipes and tips have inspired you to ditch the lunch rut and start looking forward to lunchtime again.
Now it’s your turn! Try out these easy gluten-free lunch recipes, adapt them to your tastes, and most importantly, have fun in the kitchen.
Conclusion:
You now have the tools and inspiration to transform your lunchtime routine into a gluten-free culinary celebration! From stocking your pantry to mastering make-ahead strategies and exploring a world of vibrant recipes, you’re equipped to conquer any lunch rut. Remember, the gluten-free community is all about sharing and supporting each other. So, please share your own gluten-free lunch triumphs, tips, and recipe variations in the comments below – let’s inspire each other to make every gluten-free lunch amazing!
Don’t forget to check out our other resources for more gluten-free inspiration:
- Celiac Disease: Your Practical Guide to Diet, Symptoms & Living Well
- Quick & Delicious Gluten Free Lunch Ideas: 5 Easy Recipes for Busy People
- Best 5-Star Gluten-Free Recipes: Delicious Dishes the Whole Family Will Love
- How to Make A Gluten-Free Meal Plan For The Week?
Frequently Asked Questions (FAQ) About Gluten-Free Lunch Recipes
What are some quick and easy gluten-free lunch recipes for work?
Answer: Many of the recipes in this article are perfect for work lunches! Salads like the Quinoa & Black Bean Salad and Mediterranean Chickpea Salad can be made ahead and packed in containers. Lettuce wraps are portable and require no heating. Bowls can also be prepped in components and assembled at work. Utilizing leftovers from dinner is also a super quick and easy option. Wraps, like the Roasted Vegetable & Hummus Wrap, are also very convenient to pack and eat at your desk.
Are gluten-free lunches healthy?
Answer: Yes! Gluten-free lunch recipes, like the ones we’ve shared, can be incredibly healthy. They focus on whole foods, vegetables, lean proteins, and healthy fats. It’s important to remember that “gluten-free” itself doesn’t automatically mean “healthy” (some gluten-free processed foods can be high in sugar and unhealthy fats). But by focusing on recipes made with fresh, whole ingredients, you can create lunches that are both gluten-free and packed with nutrients. Many of these recipes are also naturally gluten free dairy free lunch recipes, catering to even more dietary needs.
Where can I find gluten-free bread and wraps for sandwiches and wraps?
Answer: Gluten-free bread and wraps are widely available now! Most major grocery stores carry a selection in their gluten-free or health food sections. You can also find a wider variety at health food stores and online retailers. Experiment with different brands to find textures and flavors you like. Look for brands like Schar, Canyon Bakehouse, Little Northern Bakehouse, and BFree (availability may vary by location). When choosing, consider if you also need dairy-free options for gluten and dairy free lunch recipes.
How can I meal prep gluten-free lunches for the week?
Answer: Meal prepping gluten-free lunch recipes is easy with the right strategies! Focus on batch cooking grains (quinoa, rice), roasting vegetables, and grilling or baking protein on the weekend. Prepare dressings and sauces in advance. Store each component separately in airtight containers in the refrigerator. Then, each day, simply assemble your lunches using the pre-prepped components. Soups and stews are also excellent for making ahead and portioning out for the week.
I’m new to gluten-free eating. Are these recipes beginner-friendly?
Answer: Yes! All of these gluten-free lunch recipes are designed to be beginner-friendly. They use simple ingredients, straightforward instructions, and require no advanced cooking skills. We’ve included plenty of chef’s tips and variations to help you customize the recipes and make them your own. Don’t be intimidated – jump in and start cooking! You’ll be surprised at how easy and delicious gluten-free cooking can be.
Loved making this? Share your experience in a review!
There are no reviews yet. Be the first one to write one.
