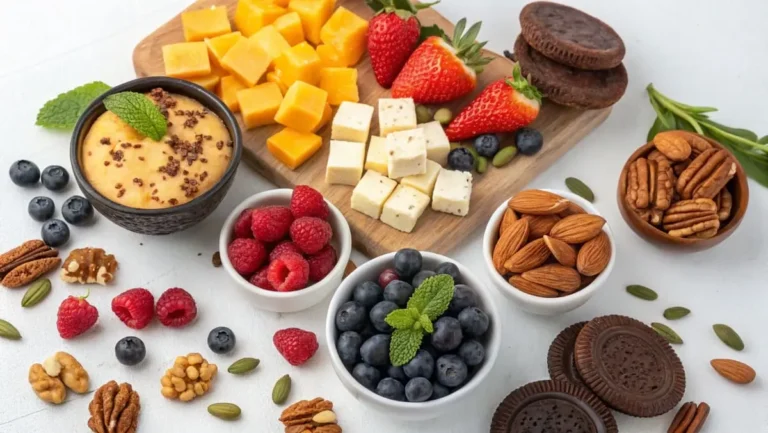
The Ultimate Guide to Gluten Free Baking: Master Techniques & Delicious Recipes
Gluten free baking can seem daunting, but it can be incredibly rewarding with the right knowledge and techniques. This comprehensive guide provides everything you need to know to achieve delicious and consistently successful gluten-free baked goods, from understanding essential ingredients to troubleshooting common problems.
Table of Contents
Understanding the Challenges of Gluten Free Baking
Gluten, a protein complex found in wheat, provides elasticity, structure, and moisture retention in traditional baking. Its absence in gluten free baking necessitates careful consideration of ingredients, techniques, and substitutions. Common challenges include:
- Dry and Crumbly Texture: Gluten-free baked goods can be dry and crumbly without proper ingredient ratios and techniques.
- Dense Texture: Insufficient leavening or overmixing can result in dense, heavy baked goods.
- Lack of Flavor: Some gluten-free flours have a bland taste requiring careful flavor balancing.
Essential Ingredients for Gluten Free Baking
1. Gluten-Free Flour Blends:
- Importance: Pre-made blends are formulated to mimic the properties of wheat flour, often combining rice flour, tapioca starch, potato starch, and xanthan gum or guar gum for binding.
- Selection: Choose blends specifically designed for cakes, breads, or cookies, as different blends have varying properties. Experiment with different brands to find your preference. For more details check our ultimate guide: Best 8 Gluten Free Flour Blends for Baking Success
2. Starches:
- Tapioca Starch: Provides a light and airy texture, good for cakes and cookies.
- Potato Starch: Adds moisture and lightness but can result in a slightly gummy texture if overused.
- Cornstarch: Another starchy option used in smaller quantities to improve texture.
3. Binding Agents:
- Xanthan Gum: A common binding agent that mimics gluten’s elasticity. Essential for structure and moisture retention.
- Guar Gum: A similar binding agent, often used in combination with or as an alternative to xanthan gum.
4. Leavening Agents:
- Baking Powder: A chemical leavening agent used in quick breads and cakes. Always use fresh baking powder.
- Baking Soda: Another chemical leavening agent, often used in combination with an acidic ingredient.
- Yeast: Used for bread making to create a rise through fermentation. Requires specific techniques and timing.
5. Fats:
- Butter: Adds flavor and moisture. Use unsalted butter for better control over salt content.
- Oil: Contributes moisture and tenderness. Different oils have different flavor profiles.
6. Liquids:
- Milk (Dairy or Non-Dairy): Adds moisture and richness.
- Water: A basic liquid used in many recipes.
7. Sweeteners:
- Sugar (Granulated, Brown, Powdered): Provides sweetness and moisture.
- Honey or Maple Syrup: Adds natural sweetness and moisture.
Essential Techniques for Gluten-Free Baking
1. Measuring Accurately:
- Importance: Precise measurements are critical in gluten-free baking due to the varied absorption rates of different gluten-free flours.
- Method: Use a kitchen scale to weigh ingredients in grams or ounces for the most accurate results.
2. Proper Mixing:
- Importance: Overmixing can develop gluten-free dough, leading to a tough texture. Undermixing results in an uneven distribution of ingredients.
- Method: Mix gently until ingredients are just combined. Avoid vigorous mixing.
3. Resting and Proofing:
- Importance: Gluten-free dough often benefits from longer resting and proofing times to allow leavening agents to fully activate.
- Method: Follow recipe instructions carefully. A warm environment is beneficial for yeast-based recipes.
4. Oven Temperature and Baking Time:
- Importance: Maintaining a consistent oven temperature is crucial. Overbaking leads to dryness while under baking produces a gummy texture.
- Method: Use an oven thermometer. Start checking for doneness a few minutes before the recipe’s suggested time.
5. Ingredient Substitutions:
- Importance: Many ingredients can be substituted. However, each substitution can affect the final texture and flavor.
- Method: Refer to reputable sources or baking guides for specific substitution ratios and techniques. Experimentation is key.
Troubleshooting Common Gluten-Free Baking Problems
- Dry and Crumbly: Add more liquid to the batter or dough, increase the fat content, or add more binding agents.
- Dense and Heavy: Ensure leavening agents are fresh, avoid overmixing, and allow adequate rising time.
- Gummy Texture: Reduce the amount of liquid or starch. Ensure the oven temperature is accurate and that the baked goods are not overbaked.
- Flat Baked Goods: Check that leavening agents are fresh and that you’ve followed the recipe instructions correctly for incorporating them.
- Uneven Baking: Ensure your oven temperature is consistent. Rotate the baking pan halfway through the baking time.
Delicious Gluten-Free Baking Recipes
Cakes:
Gluten-Free Chocolate Fudge Cake
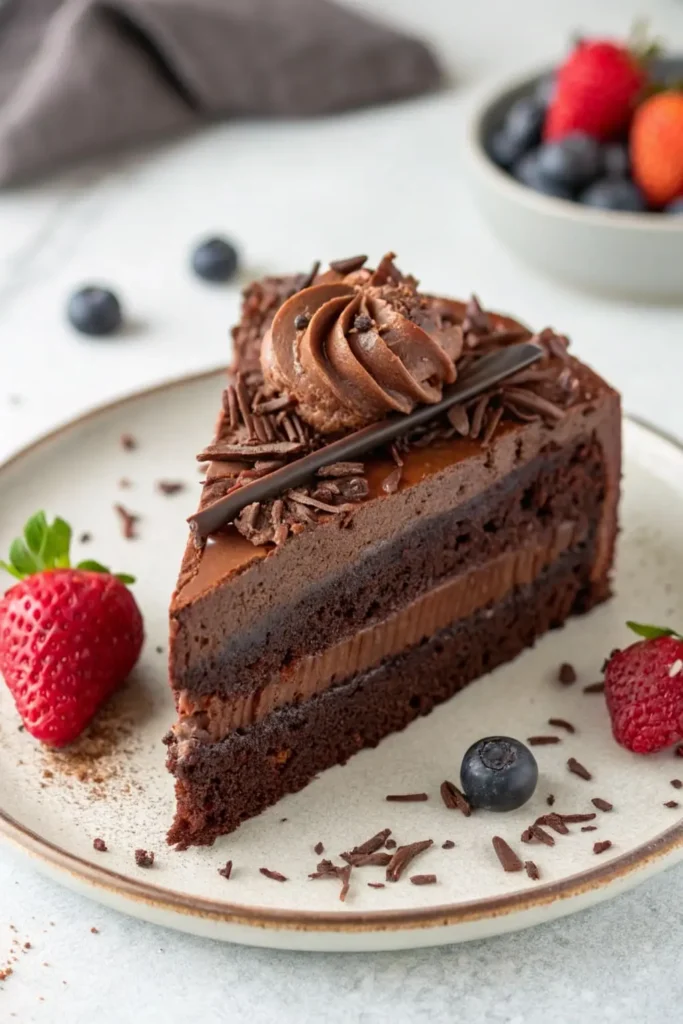
This decadent Gluten-Free Chocolate Fudge Cake delivers all the rich, moist, and intensely chocolatey flavor you crave without any gluten. Utilizing a blend of gluten-free flours and incorporating moisture-enhancing ingredients, this recipe ensures a tender crumb and a truly indulgent experience. The accompanying fudge frosting is the perfect complement, adding an extra layer of lusciousness.
Ingredients:
For the Gluten-Free Chocolate Cake:
- 1 ½ cups (195g) gluten-free all-purpose flour blend (ensure it contains xanthan gum or add 1 teaspoon separately)
- ¾ cup (75g) unsweetened cocoa powder
- 1 ½ teaspoons baking soda
- ¾ teaspoon baking powder
- ¾ teaspoon salt
- 1 ½ cups (300g) granulated sugar
- ½ cup (100g) unsalted butter, softened
- 2 large eggs, at room temperature
- 1 teaspoon pure vanilla extract
- 1 cup (240ml) buttermilk (or dairy-free alternative + 1 tsp lemon juice/vinegar)
- ¾ cup (180ml) hot brewed coffee
For the Chocolate Fudge Frosting:
- ½ cup (1 stick/113g) unsalted butter, softened
- 3 cups (360g) powdered sugar
- ½ cup (60g) unsweetened cocoa powder
- ⅓ cup (80ml) milk (or dairy-free alternative)
- 1 teaspoon pure vanilla extract
- ⅛ teaspoon salt
Equipment:
- Two 9-inch round cake pans
- Parchment paper
- Mixing bowls (large and medium)
- Electric mixer (handheld or stand mixer)
- Spatula
- Measuring cups and spoons
- Liquid measuring cup
- Wire rack
- Offset spatula (optional, for frosting)
Instructions:
Step 1: Prepare the Cake Pans and Preheat Oven (Prep – 5 minutes)
- Preheat oven to 350°F (175°C).
- Grease and flour two 9-inch round cake pans. For extra insurance against sticking, line the bottoms with parchment paper rounds.
Step 2: Whisk Dry Ingredients (Prep – 5 minutes)
- In a large mixing bowl, whisk together the gluten-free flour blend, cocoa powder, baking soda, baking powder, and salt until well combined. This ensures even distribution of the leavening agents and cocoa.
Step 3: Cream Butter and Sugar (Prep – 3 minutes)
- In a separate large mixing bowl, using an electric mixer, cream together the softened butter and granulated sugar until light and fluffy. This process incorporates air, contributing to a tender cake.
Step 4: Add Eggs and Vanilla (Prep – 2 minutes)
- Beat in the eggs one at a time, mixing well after each addition.
- Stir in the vanilla extract.
Step 5: Alternate Dry and Wet Ingredients (Prep – 5 minutes)
- In a small bowl or liquid measuring cup, whisk together the buttermilk (or alternative) and hot coffee. The hot liquid helps to bloom the cocoa and enhances its flavor.
- Gradually add the dry ingredients to the wet ingredients, alternating with the buttermilk mixture, beginning and ending with the dry ingredients. Mix on low speed until just combined after each addition. Do not overmix.
Step 6: Divide Batter and Bake (Prep – 2 minutes, Cook – 30-35 minutes)
- Divide the batter evenly between the prepared cake pans.
- Bake for 30-35 minutes, or until a wooden skewer inserted into the center comes out clean.
Step 7: Cool the Cakes (Prep – 5 minutes)
- Let the cakes cool in the pans for 10 minutes before inverting them onto a wire rack to cool completely.
Step 8: Prepare the Chocolate Fudge Frosting (Prep – 5 minutes)
- In a large mixing bowl, using an electric mixer, cream the softened butter until smooth and fluffy.
- Gradually add the powdered sugar and cocoa powder, beating on low speed until combined.
- Gradually add the milk and vanilla extract, beating until smooth and creamy. Add the salt and beat for another minute until light and fluffy.
Step 9: Frost the Cake (Prep – 5 minutes)
- Once the cakes are completely cool, place one cake layer on a serving plate or cake stand.
- Spread an even layer of frosting over the top.
- Carefully place the second cake layer on top.
- Frost the top and sides of the cake with the remaining frosting.
Step 10: Serve (Prep – 1 minute)
- Slice and serve your delicious gluten-free chocolate fudge cake!
Chef’s Tips:
- Room Temperature Ingredients: Using room temperature butter, eggs, and buttermilk helps them emulsify properly, resulting in a smoother batter and a more tender cake.
- Don’t Overmix: Overmixing gluten-free batter can lead to a tough cake. Mix until just combined.
- Xanthan Gum is Key: Xanthan gum acts as a binder in gluten-free baking, mimicking the role of gluten. Ensure your flour blend contains it or add it separately.
- Hot Coffee Enhances Chocolate Flavor: The hot coffee intensifies the cocoa flavor and adds moisture to the cake. Don’t worry, the coffee flavor itself won’t be prominent.
- Buttermilk Substitute: If you don’t have buttermilk, you can make a substitute by adding 1 teaspoon of lemon juice or white vinegar to 1 cup of milk (dairy or non-dairy). Let it sit for 5 minutes to curdle slightly.
- Cool Completely Before Frosting: Ensure the cakes are completely cool before frosting. Warm cakes will cause the frosting to melt and slide off.
- Level the Cake Layers (Optional): If your cake layers are uneven, use a serrated knife to gently level the tops for a more professional look.
- For Extra Fudgy Frosting: You can melt some semi-sweet chocolate and whisk it into the frosting for an even richer flavor.
Special Techniques and Cooking Methods:
- Gluten-Free Baking: This recipe utilizes a gluten-free flour blend, which typically consists of a combination of starches and flours like rice flour, tapioca starch, and potato starch. The absence of gluten requires the addition of xanthan gum to provide structure and binding.
- Creaming Method: Creaming together the butter and sugar incorporates air into the batter, contributing to a light and airy texture.
- Alternating Wet and Dry Ingredients: This method helps to prevent overmixing and ensures that the ingredients are incorporated evenly.
Nutritional Information (per serving, approximate):
- Calories: 400-550 (depending on frosting thickness)
- Fat: 18-25g
- Saturated Fat: 10-15g
- Cholesterol: 80-100mg
- Sodium: 200-300mg
- Carbohydrates: 60-75g
- Fiber: 2-3g
- Sugar: 40-50g
- Protein: 4-6g
Ingredients to be Careful Of:
- Sugar: This is a dessert and contains a significant amount of sugar. Adjust portion sizes accordingly if you are monitoring your sugar intake.
- Fat: The frosting is high in fat.
- Gluten: Ensure all ingredients used are certified gluten-free if you have celiac disease or a gluten intolerance.
Dietary Restrictions:
- Gluten-Free: This recipe is specifically designed to be gluten-free.
- Dairy-Free (with modifications): Use a dairy-free butter substitute, dairy-free buttermilk alternative (like almond milk with lemon juice), and dairy-free milk for the frosting.
- Nut-Free: This recipe is naturally nut-free, but always check the ingredients of your flour blend and other components to ensure they were not processed in a facility that also handles nuts.
Cookies:
Gluten-free oatmeal Raisin Cookies
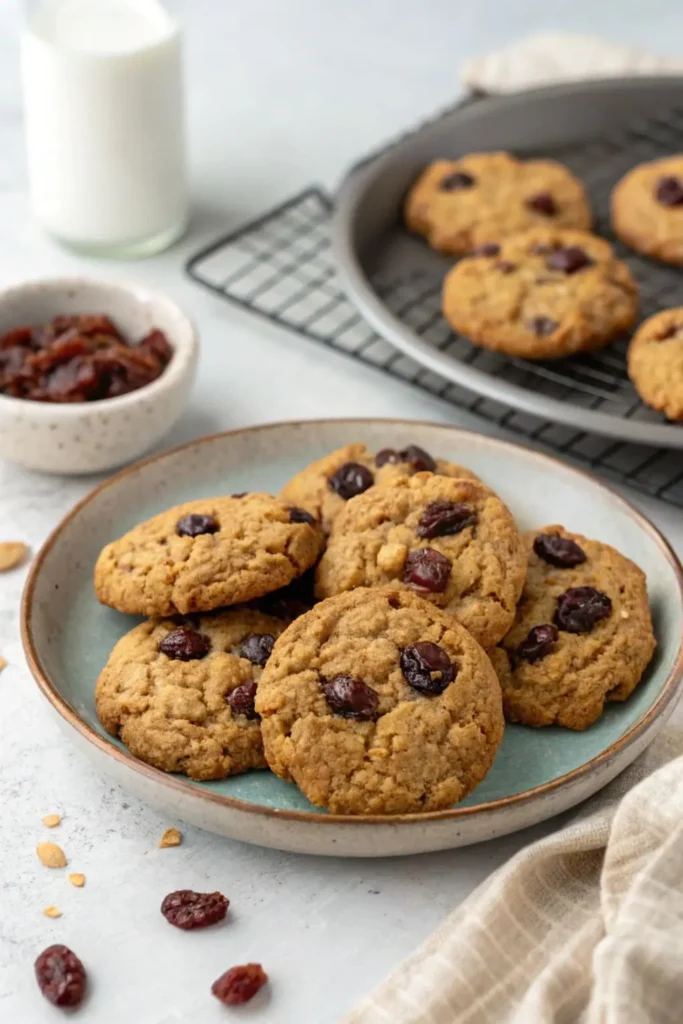
These chewy and comforting Gluten-Free Oatmeal Raisin Cookies are a classic treat made accessible for those avoiding gluten. By carefully selecting gluten-free oats and a blend of gluten-free flours, these cookies achieve the perfect balance of soft centers and slightly crisp edges, bursting with the warm flavors of cinnamon and sweet raisins.
Ingredients:
- 1 cup (227g) unsalted butter, softened
- ¾ cup (150g) packed light brown sugar
- ¾ cup (150g) granulated sugar
- 2 large eggs, at room temperature
- 1 teaspoon pure vanilla extract
- 1 ½ cups (135g) gluten-free rolled oats (certified gluten-free)
- ¾ cup (90g) gluten-free all-purpose flour blend (ensure it contains xanthan gum or add ½ teaspoon separately)
- 1 teaspoon ground cinnamon
- ½ teaspoon baking soda
- ½ teaspoon salt
- ½ cup (60g) chopped walnuts or pecans (optional)
- 1 cup (150g) raisins
Equipment:
- Large mixing bowl
- Electric mixer (handheld or stand mixer)
- Measuring cups and spoons
- Cookie sheets
- Parchment paper or silicone baking mats
- Rubber spatula or wooden spoon
- Wire rack
Instructions:
Step 1: Preheat Oven and Prepare Baking Sheets (Prep – 3 minutes)
- Preheat oven to 350°F (175°C).
- Line two cookie sheets with parchment paper or silicone baking mats. This prevents sticking and makes cleanup easier.
Step 2: Cream Butter and Sugars (Prep – 5 minutes)
- In a large mixing bowl, using an electric mixer, cream together the softened butter, packed light brown sugar, and granulated sugar until light and fluffy. This process incorporates air, which contributes to the cookies’ texture.
Step 3: Beat in Eggs and Vanilla (Prep – 2 minutes)
- Beat in the eggs one at a time, mixing well after each addition.
- Stir in the vanilla extract.
Step 4: Combine Dry Ingredients (Prep – 3 minutes)
- In a separate medium bowl, whisk together the gluten-free rolled oats, gluten-free all-purpose flour blend, cinnamon, baking soda, and salt.
Step 5: Add Dry Ingredients to Wet Ingredients (Prep – 2 minutes)
- Gradually add the dry ingredients to the wet ingredients, mixing on low speed until just combined. Do not overmix, as this can result in tough cookies.
Step 6: Stir in Mix-Ins (Prep – 2 minutes)
- Stir in the chopped walnuts or pecans (if using) and raisins until evenly distributed throughout the dough.
Step 7: Scoop and Bake (Prep – 3 minutes, Cook – 12-15 minutes per batch)
- Drop rounded tablespoons of cookie dough onto the prepared baking sheets, leaving about 2 inches between each cookie.
- Bake for 12-15 minutes, or until the edges are lightly golden brown and the centers are still slightly soft.
Step 8: Cool and Serve (Prep – 5 minutes)
- Let the cookies cool on the baking sheets for a few minutes before transferring them to a wire rack to cool completely. This prevents them from breaking.
- Once cooled, serve and enjoy!
Chef’s Tips:
- Use Certified Gluten-Free Oats: Regular oats can be cross-contaminated with gluten. Look for oats that are specifically certified gluten-free.
- Softened Butter is Key: Ensure your butter is softened but not melted. It should be soft enough to press a finger into but still hold its shape.
- Don’t Overmix: Overmixing can develop gluten in regular flour, leading to tough cookies. While gluten-free flour doesn’t behave the same way, overmixing can still affect the texture. Mix until just combined.
- Chill the Dough (Optional): For thicker cookies that spread less, you can chill the dough in the refrigerator for 30 minutes before scooping and baking.
- Vary the Spices: Feel free to add a pinch of nutmeg or cloves for extra warmth.
- Add Different Dried Fruits: Substitute or add other dried fruits like chopped cranberries, apricots, or dates.
- Adjust the Nuts: Use your favorite nuts or omit them entirely if you have allergies or preferences.
- For Chewier Cookies: Under bake the cookies slightly. They will continue to set as they cool.
- Storage: Store cooled cookies in an airtight container at room temperature for up to 5 days.
Special Techniques and Cooking Methods:
- Gluten-Free Baking: Gluten-free baking requires understanding the role of gluten and using substitutes to achieve similar results. In this recipe, the gluten-free flour blend and xanthan gum (if needed) provide structure, while the oats contribute to chewiness.
Nutritional Information (per cookie, approximate):
- Calories: 150-200 (depending on size and additions)
- Fat: 7-10g
- Saturated Fat: 4-6g
- Cholesterol: 30-40mg
- Sodium: 80-120mg
- Carbohydrates: 20-25g
- Fiber: 1-2g
- Sugar: 10-14g
- Protein: 2-3g
Ingredients to be Careful Of:
- Sugar: These cookies contain a significant amount of sugar. Adjust portion sizes if you are monitoring your sugar intake.
- Fat: While using butter contributes to flavor and texture, be mindful of the fat content.
- Nuts: This recipe includes nuts as an optional ingredient. Omit them if you have nut allergies.
- Gluten: Ensure the oats are certified gluten-free and the flour blend is also gluten-free to accommodate dietary restrictions.
Dietary Restrictions:
- Gluten-Free: This recipe is specifically designed to be gluten-free by using gluten-free oats and flour.
- Dairy-Free (with modifications): Substitute the butter with a dairy-free butter alternative.
- Nut-Free (with modifications): Omit the walnuts or pecans.
Other Cookies Recipes:
Bread:
Gluten-Free Sourdough Bread
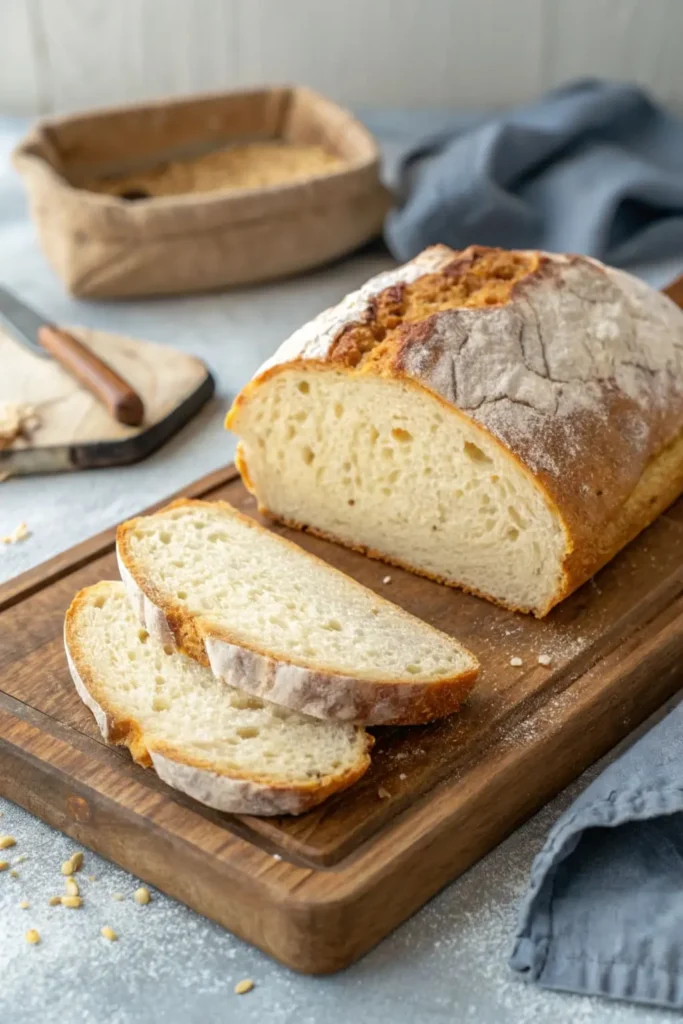
This Gluten-Free Sourdough Bread offers the tangy flavor and satisfying chew of traditional sourdough, made accessible for those avoiding gluten. The process involves cultivating a gluten-free sourdough starter and carefully handling the dough, which has a different texture and behavior compared to wheat-based dough. While it requires patience and attention, the reward is a delicious and naturally leavened loaf.
Ingredients:
For the Gluten-Free Sourdough Starter (Levain):
- 50g gluten-free all-purpose flour blend (see Chef’s Tips)
- 50g water (lukewarm, around 85-90°F/29-32°C)
(Maintain this ratio for feeding – see instructions)
For the Gluten-Free Sourdough Bread:
- 150g active gluten-free sourdough starter (levain) – ripe and bubbly (see instructions)
- 300g warm water (around 95-105°F/35-40°C)
- 400g gluten-free all-purpose flour blend (same blend as a starter)
- 10g psyllium husk powder (not whole husks)
- 8g fine sea salt
Equipment:
- Kitchen scale
- Large glass jar or container with lid (for starter)
- Medium mixing bowl (for starter)
- Large mixing bowl (for dough)
- Flexible spatula or dough scraper
- Bench scraper (optional)
- Banneton basket (proofing basket) or a bowl lined with a floured cloth
- Dutch oven or oven-safe pot with lid
- Parchment paper
- Sharp knife or lame (for scoring)
- Wire rack
Instructions:
This recipe requires several days for starter development and bulk fermentation. Plan accordingly.
Day 1-7 (or longer): Creating and Maintaining the Gluten-Free Sourdough Starter (Levain)
- Day 1: Initial Mix: In a medium mixing bowl, combine 50g of gluten-free all-purpose flour blend and 50g of lukewarm water. Mix well until a smooth, thick paste forms. Transfer to a clean glass jar or container. Mark the level of the starter on the jar. Cover loosely with a lid or cloth.
- Days 2-7 (or longer): Feeding the Starter: Observe the starter. You might not see much activity in the first few days. Starting on Day 2 (or when you see some bubbles), discard about half of the starter (this is crucial to prevent excessive volume). Add 50g of gluten-free all-purpose flour blend and 50g of lukewarm water. Mix well, cover, and mark the level. Repeat this feeding process every 12-24 hours, depending on your room temperature. Warmer temperatures will lead to faster fermentation.
- Signs of an Active Starter: Your starter is ready to bake with when it has reliably doubled in size within 4-8 hours after feeding, is bubbly throughout, and has a slightly tangy aroma. The texture should be light and airy. This can take anywhere from 5 days to 2 weeks, depending on your environment.
Day of Baking:
Step 1: Prepare the Levain (if needed) (Prep – overnight)
- If your starter is not yet at its peak activity, feed it 4-6 hours before mixing the dough. You want to use it when it has doubled and is bubbly.
Step 2: Autolyse (Optional, but recommended) (Prep – 20 minutes)
- In a large mixing bowl, combine the 400g gluten-free flour blend and 300g of warm water. Mix with a spatula until just combined and no dry flour remains. This process, called autolyze, hydrates the flour and improves the final texture.
- Cover the bowl and let it rest for 20-30 minutes.
Step 3: Mix the Dough (Prep – 10 minutes)
- Add the 150g active sourdough starter to the autolysed dough. Mix thoroughly with your hands or a spatula until well combined.
- Sprinkle the psyllium husk powder over the dough and mix again until fully incorporated. Psyllium husk acts as a binder in gluten-free baking, mimicking the role of gluten.
- Add the salt and mix for another 2-3 minutes until the dough starts to come together and feels a bit more cohesive. Gluten-free dough will be stickier and less elastic than wheat dough.
Step 4: Bulk Fermentation (First Rise) (Fermentation – 3-6 hours)
- Cover the bowl and let the dough bulk ferment (rise) at room temperature (ideally around 75-78°F/24-26°C) for 3-6 hours. Gluten-free dough doesn’t rise as dramatically as wheat dough. Look for signs of activity like small bubbles forming throughout the dough and a slight increase in volume (around 20-30%).
- Perform 2-3 sets of “coil folds” during the first 2 hours of bulk fermentation. To do this, gently lift a portion of the dough, stretching it upwards, and then fold it over onto itself. Rotate the bowl and repeat 3-4 times. This helps to develop strength in the dough.
Step 5: Pre-shape (Prep – 5 minutes)
- Lightly flour your work surface. Gently scrape the dough out of the bowl using a flexible spatula or dough scraper.
- Using a bench scraper or your hands, gently shape the dough into a round or oblong. Be careful not to degas the dough too much.
Step 6: Final Proof (Second Rise) (Proofing – 1-2 hours)
- Generously flour a banneton basket or a bowl lined with a well-floured cloth.
- Gently place the shaped dough seam-side up into the basket.
- Cover the basket and let it proof at room temperature for 1-2 hours, or until the dough feels slightly puffy and jiggly. You can also proof it in the refrigerator overnight for a tangier flavor.
Step 7: Preheat Dutch Oven and Score the Dough (Prep – 5 minutes)
- Place your Dutch oven (with the lid on) in the oven and preheat to 450°F (232°C) for at least 30 minutes. This creates a hot environment with trapped steam, essential for a good crust.
- Carefully remove the hot Dutch oven from the oven.
- Gently invert the proofed dough from the banneton basket into the Dutch oven lined with parchment paper (this makes removal easier).
- Using a sharp knife or lame, score the top of the dough with a single deep slash or a pattern. This controls where the bread expands during baking.
Step 8: Bake (Cook – 45-55 minutes)
- Cover the Dutch oven with its lid and bake for 25 minutes.
- Remove the lid and continue baking for another 20-30 minutes, or until the crust is deeply golden brown and the internal temperature reaches 205-210°F (96-99°C).
Step 9: Cool (Prep – at least 2 hours)
- Carefully remove the baked bread from the Dutch oven and transfer it to a wire rack to cool completely. Resist the urge to slice into it while it’s hot, as this can result in a gummy texture. Allow it to cool for at least 2 hours.
Chef’s Tips:
- Gluten-Free Flour Blends: The success of this recipe heavily relies on a good quality gluten-free all-purpose flour blend. Look for blends that contain a mix of starches (like tapioca, potato, cornstarch) and flours (like brown rice, sorghum, millet). Ensure your blend contains xanthan gum or add it separately if needed (around ½ teaspoon for this recipe if your blend lacks it, though psyllium husk is the primary binder here). Consistency between flour blends can vary, so adjustments might be needed.
- Starter Activity is Key: A reliably active and bubbly starter is crucial for proper leavening. Be patient during the starter development process.
- Hydration Levels: Gluten-free flours absorb water differently than wheat flour. This recipe uses a higher hydration, which is common in gluten-free sourdough. The dough will be sticky, but resist the urge to add more flour.
- Psyllium Husk Power: Psyllium husk is essential for providing structure and elasticity in gluten-free sourdough. Use the powder form, not whole husks.
- Gentle Handling: Gluten-free dough is more delicate than wheat dough. Handle it gently during shaping to avoid deflating it.
- Dutch Oven is Your Friend: Baking in a Dutch oven creates a steamy environment that helps develop a good crust. If you don’t have a Dutch oven, you can create a similar effect by placing a tray of water in the bottom of your oven during the initial baking phase.
- Listen to Your Dough: Pay attention to how the dough feels throughout the process. It should feel slightly puffy and alive.
- Scoring Matters: Scoring the dough allows for controlled expansion during baking and prevents random cracking.
- Cool Completely: Allow the bread to cool completely before slicing to allow the internal structure to set and prevent a gummy texture.
Special Techniques and Cooking Methods:
- Sourdough Fermentation: This process relies on wild yeasts and bacteria present in the flour to leaven the bread, resulting in a characteristic tangy flavor and improved digestibility.
- Autolyze: This technique involves mixing flour and water and allowing it to rest, which hydrates the flour and improves dough extensibility.
- Coil Folds: Gentle stretching and folding of the dough during bulk fermentation helps to develop strength and structure.
- Baking in a Dutch Oven: This method traps steam during the initial part of baking, which helps to create a crisp crust and a soft, open crumb.
Nutritional Information (per slice, approximate):
- Calories: 150-200 (depending on slice size)
- Fat: 1-2g
- Saturated Fat: 0g
- Cholesterol: 0mg
- Sodium: 150-200mg
- Carbohydrates: 30-40g
- Fiber: 3-5g
- Sugar: Less than 1g
- Protein: 3-5g
Ingredients to be Careful Of:
- Gluten: Ensure all ingredients, especially the flour blend, and oats (if used in the blend), are certified gluten-free if you have celiac disease or gluten sensitivity. Cross-contamination can easily occur.
- Individual Flour Blend Composition: The nutritional values can vary depending on the specific gluten-free flour blend used.
Dietary Restrictions:
- Gluten-Free: This recipe is specifically designed to be gluten-free.
- Dairy-Free: This recipe is naturally dairy-free.
- Egg-Free: This recipe is naturally egg-free.
- Nut-Free: This recipe is naturally nut-free, but always check the ingredients of your flour blend to ensure it was not processed in a facility that also handles nuts.
- Vegan: This recipe is vegan.
Other Baked Goods:
- Gluten-Free Muffins
- Gluten-Free Brownies
- Gluten-Free Pizza Crust
Recipe Table Summary (Example – Expand with chosen recipes)
| Recipe | Yield | Prep Time (min) | Cook Time (min) |
| Gluten-Free Chocolate Fudge Cake | 12 servings | 30 | 30-35 |
| Gluten-Free Oatmeal Raisin Cookies | 18-24 cookies | 15 | 12-15 |
| Gluten-Free Sourdough Bread | 1 loaf | 45 minutes (over several days for starter and bulk fermentation) | 45-55 |
Chef’s Tips for Gluten-Free Baking Success
- Use a Kitchen Scale: Weighing ingredients is crucial for consistent results.
- Fresh Ingredients: Use fresh, high-quality ingredients.
- Don’t Overmix: Overmixing leads to tough baked goods.
- Patience: Gluten-free baking often requires more time and patience than traditional baking.
Frequently Asked Questions (FAQs) About Gluten Free Baking
Why is gluten free baking considered more difficult than traditional baking?
Gluten free baking presents unique challenges because it lacks gluten, a protein in wheat that provides structure, elasticity, and moisture retention. Without gluten, achieving the desired texture, rise, and moisture in baked goods requires a deeper understanding of ingredient substitutions and specialized techniques. As highlighted in our guide, common issues include dry textures, dense results, and flavor balancing, all of which are addressed with the right knowledge and approach.
What are the main challenges you’ll encounter in gluten free baking?
As discussed in this guide, the primary challenges in gluten free baking are achieving the right texture, avoiding dryness and crumbly results, and preventing baked goods from becoming too dense. Additionally, some gluten-free flours can have a less pronounced flavor, requiring attention to flavor balancing in recipes. However, by understanding these challenges and implementing the techniques outlined in this article, you can consistently create delicious gluten-free treats.
What are the essential ingredients I need for gluten-free baking?
To succeed in gluten-free baking, you’ll need to stock your pantry with key ingredients. These include gluten-free flour blends designed to mimic wheat flour, starches like tapioca starch and potato starch for texture, binding agents such as xanthan gum or guar gum for structure, appropriate leavening agents (baking powder, baking soda, yeast), quality fats like butter and oil, suitable liquids, and sweeteners. Our guide provides a detailed breakdown of each of these essential ingredient categories and their roles in gluten-free baking.

