Want Gluten Free Sourdough Bread? How to Make It at Home (Step-by-Step)
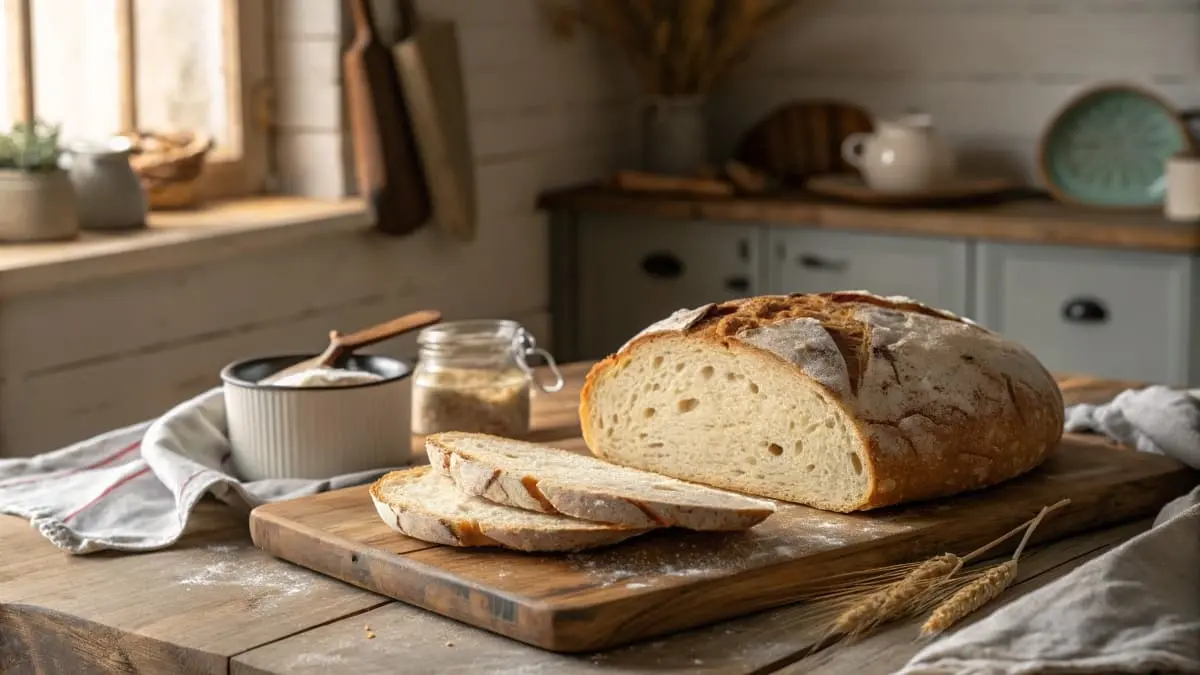
Have you been dreaming of the tangy, chewy perfection of gluten free sourdough bread? Thought it was impossible because you’re avoiding gluten? Think again! Baking gluten free sourdough bread at home is not only achievable, it’s incredibly rewarding and results in bread that is unbelievably delicious and satisfying. This comprehensive, step-by-step guide will be your best friend, walking you through exactly how to make gluten free sourdough bread that will rival any bakery loaf, right in your own kitchen. Get ready to bake perfect gluten free sourdough bread and amaze yourself (and everyone who tastes it!).
Table of Contents
Why Gluten Free Sourdough Bread? Unlocking the Magic of Gluten-Free Baking
Gluten-free baking has transformed dramatically. It’s no longer just about settling for substitutes; it’s about crafting truly exceptional flavors and textures that everyone, regardless of dietary needs, can wholeheartedly enjoy. And when we bring sourdough into the picture? Well, gluten free sourdough bread takes the experience to a completely new level of deliciousness and digestibility.
The Rise of Gluten-Free Baking: More Than Just a Trend Towards Healthier Options
Choosing gluten-free options has moved far beyond a niche diet. Today, it’s a mainstream and conscious choice for a growing number of people, and for genuinely compelling health reasons!
Understanding Gluten Intolerance and Celiac Disease: Why Gluten-Free Matters
Gluten-free isn’t a choice for many; it’s vital for health. For those with celiac disease, gluten triggers a serious autoimmune reaction damaging the small intestine, even in trace amounts. Beyond celiac, gluten intolerance also causes digestive issues and discomfort. Therefore, delicious gluten-free bread is crucial for both groups to maintain their well-being and enjoy meals
Why Choose Gluten Free Options for Bread and Beyond
Whether you’re managing celiac disease, dealing with gluten intolerance, or simply discover that you feel better when you reduce or eliminate gluten from your diet, exploring gluten-free options opens up a world of culinary delight. And when it comes to bread, gluten-free sourdough bread stands out as a truly exceptional and flavorful choice.
The Unique Benefits of Sourdough Bread (Even When It’s Gluten-Free!)
Sourdough bread, in general, offers more than just a distinctive, tangy taste; it’s the result of a unique fermentation process that unlocks a range of benefits, and these advantages hold true even when we’re talking about wonderfully gluten free sourdough bread!
Improved Digestion: The Power of Fermentation in Gluten Free Sourdough Bread
Sourdough bread, including the gluten-free variety, is made using a “starter” – a bubbly, living culture of flour and water teeming with beneficial bacteria and wild yeasts. These microscopic powerhouses work their magic through fermentation! They naturally break down some of the complex carbohydrates present in the flour. This pre-digestion makes gluten free sourdough bread often easier for many people to digest compared to conventionally made breads. This is particularly beneficial for those who might find regular bread a bit heavy or uncomfortable.
Enhanced Flavor: The Tangy and Complex Taste of Gluten Free Sourdough Bread
That unmistakable, delicious tangy flavor that defines sourdough bread? It’s all thanks to the fermentation process! The friendly bacteria in the starter produce natural acids, and these acids are responsible for that signature sour taste that makes gluten free sourdough bread so unique. This depth of flavor is far more complex and satisfying than typical store-bought bread, adding a wonderful dimension to sandwiches, toast, and countless other dishes.
Nutrient Boost: Unlocking Goodness in Gluten-Free Sourdough Bread
The fermentation process in sourdough bread isn’t just about flavor and digestion; it also plays a role in enhancing nutrition! Fermentation can actually increase the bioavailability of certain vitamins and minerals found in the grains. This means your body can absorb these beneficial nutrients more effectively. Furthermore, gluten free sourdough bread often has a lower glycemic index compared to some other types of bread. This can contribute to a gentler impact on your blood sugar levels, making it a potentially healthier choice.
Debunking Gluten Free Sourdough Bread Myths: Setting the Record Straight
There are some common misconceptions floating around about gluten-free sourdough bread. Let’s address these myths head-on and set the record straight!
Myth 1: Gluten Free Sourdough Bread is Impossible to Make
Absolutely false! While it’s true that gluten-free sourdough bread baking differs from traditional wheat-based sourdough, creating truly delicious and successful gluten free sourdough bread at home is entirely within reach. The key is understanding the unique characteristics of gluten-free flours and adapting your baking techniques accordingly.
Myth 2: Gluten-Free Sourdough Bread Tastes Bland and Has a Dense Texture
Again, simply not true! When gluten-free sourdough bread is made with care and expertise, it can be incredibly flavorful and boast a truly delightful texture. Choosing the right blend of gluten-free flours and mastering the art of proper fermentation are the secrets to achieving a gluten-free sourdough loaf that’s airy, wonderfully chewy, and bursting with that distinctive sourdough tang.
Myth 3: Making Gluten Free Sourdough Bread is Too Difficult for Home Bakers
While sourdough baking, in general, does require a degree of attention and practice, it’s definitely not an impossible feat, especially making gluten free sourdough bread. With a well-tested recipe, clear and easy-to-follow instructions like the ones you’ll find in this guide, and a little patience as you learn, even beginner bakers can confidently create amazing gluten free sourdough bread right in their own kitchens. This guide is carefully designed to make the process as straightforward and accessible as possible for you!
Gathering Your Gluten-Free Sourdough Bread Arsenal: Essential Ingredients & Equipment for Success
Like any culinary adventure, having the right high-quality ingredients and the appropriate tools at your fingertips will make your gluten free sourdough bread baking journey significantly smoother, more enjoyable, and ultimately, more successful. Let’s gather all the gluten free sourdough bread essentials you’ll need!
The Essential Gluten Free Flour Blend: The Foundation for Perfect Gluten-Free Sourdough Bread
Gluten is the protein that gives traditional wheat bread its characteristic structure and elasticity. Since we’re embarking on gluten-free baking, we need to cleverly recreate that crucial structure using a carefully balanced blend of different gluten-free flours and starches. Think of it as building something amazing with LEGOs – each different shape and size of brick works together to construct the final, impressive masterpiece! The right gluten-free flour blend is the foundation of great gluten free sourdough bread.
Understanding Gluten-Free Flours: Rice Flour, Tapioca Starch, Sorghum Flour, and More
- Rice Flour (Brown or White): A true workhorse and a cornerstone in gluten-free baking. Brown rice flour brings a subtly nutty flavor and a boost of fiber to the blend, while white rice flour offers a milder taste profile. Both provide essential structure to our gluten-free flour blend.
- Tapioca Starch (or Tapioca Flour): This is the secret ingredient for achieving that desirable chewiness in gluten-free sourdough bread! Tapioca starch is a superhero when it comes to adding elasticity and that satisfying chew that we often miss in gluten-free breads. It also plays a key role in creating a light and airy crumb structure.
- Sorghum Flour: A wonderfully light and slightly sweet gluten-free flour that contributes to the overall softness and refined texture of gluten free sourdough bread. It’s essential for minimizing any potential grittiness in the final product, which can sometimes be a concern in gluten-free baking.
- Potato Starch (not Potato Flour – Important!): It’s crucial to distinguish between potato starch and potato flour! Potato starch is a fine, pure white powder that excels at moisture retention and contributes to creating a beautifully tender crumb in gluten-free sourdough bread. It’s a vital ingredient for preventing dryness, a common challenge in gluten-free bread.
- Psyllium Husk Powder: This is truly the magic binder in gluten-free sourdough bread baking. Psyllium husk is a form of soluble fiber that, when combined with water, transforms into a gel-like substance. This unique property allows it to effectively mimic some of the essential binding characteristics of gluten. It’s absolutely essential for providing structure in gluten-free bread and preventing it from becoming crumbly and falling apart.
Pre-Made Gluten-Free Flour Blends: Weighing Convenience Against Customization for Sourdough Bread
Pre-mixed gluten-free flours offer convenience, but for sourdough, custom blends are superior. Creating your own gluten-free flour blend gives you greater control over the taste and texture of your sourdough bread. Pre-made blends can sometimes be too starchy and aren’t always optimized for sourdough baking. Plus, making your own blend can be more cost-effective for frequent gluten-free sourdough bakers.
Our Recommended Gluten-Free Flour Blend Recipe: The Perfect Mix for Sourdough Bread Success
This thoughtfully crafted gluten-free flour blend recipe is specifically designed to provide you with a balanced flavor and an exceptional texture, making it absolutely perfect for baking outstanding gluten-free sourdough bread. Once you’ve baked with it a few times, you can always make subtle adjustments to fine-tune it to your exact personal preferences.
Flour Blend Recipe – Your Go-To for Gluten-Free Sourdough Bread
| Ingredient | Grams | Cups | Notes |
| Brown Rice Flour | 150g | 1 ¼ cup | Provides structure and nutty flavor – essential for gluten-free sourdough bread |
| Tapioca Starch | 100g | ¾ cup | Adds chewiness and elasticity – key to gluten-free sourdough bread texture |
| Sorghum Flour | 75g | ½ cup | Contributes to softness and texture, improving gluten-free sourdough bread quality |
| Potato Starch | 50g | ½ cup | Helps with moisture retention, preventing dry gluten-free sourdough bread |
| Psyllium Husk Powder | 10g | 2 tbsp | Crucial for binding and structure – the secret to gluten-free sourdough bread success |
Simple Instructions for Preparing Your Flour Blend:
- In a large mixing bowl, simply whisk together all the listed ingredients – brown rice flour, tapioca starch, sorghum flour, potato starch, and psyllium husk powder – until they are thoroughly combined. Ensure there are no clumps.
- Transfer your freshly made gluten-free flour blend to an airtight container for storage. It’s perfectly ready to use whenever the inspiration to bake delicious gluten-free sourdough bread strikes! Store at room temperature for optimal freshness.
The Star of the Show: Cultivating Your Own Gluten-Free Sourdough Bread Starter
The sourdough starter is truly the heart and soul of authentic sourdough bread. It’s what transforms ordinary flour and water into something extraordinary!
What Exactly is a Sourdough Bread Starter? A Living, Breathing Ecosystem for Gluten-Free Baking
A sourdough starter is a vibrant, living culture composed of wild yeasts and beneficial bacteria that you cultivate from a simple mixture of flour and water. Think of it as your own miniature, fascinating pet that you nurture and feed! These microorganisms are the magic behind sourdough bread. They carry out the fermentation process in the dough, producing those signature complex sourdough flavors and that airy, wonderfully textured crumb that we all love in gluten-free sourdough bread.
Can You Use a “Regular” Wheat-Based Starter for Gluten-Free Sourdough Bread? (Absolutely Not – Gluten Contamination is a Risk)
If you are baking gluten-free for health reasons, such as managing celiac disease or gluten intolerance, it’s absolutely critical that you never use a sourdough starter that has been made with wheat flour or has ever been used to bake wheat-based bread. Even microscopic amounts of gluten can lead to cross-contamination, rendering your gluten-free sourdough bread unsuitable and unsafe for those with gluten sensitivities. You must use a dedicated gluten-free sourdough starter that has been exclusively maintained with gluten-free flours.
How to Obtain a Healthy Gluten-Free Bread Starter for Your Baking Adventures
Luckily, acquiring a gluten-free starter is easier than you might think. You have several excellent options:
- Purchase a Gluten-Free Starter Online: Numerous online retailers specialize in high-quality sourdough starters, and many of them offer excellent gluten-free sourdough bread starters. A quick online search for “gluten-free sourdough starter” will reveal a variety of reputable sources. (External Link Suggestion: Link to a well-regarded online retailer specializing in gluten-free sourdough bread starters, such as Breadtopia or Cultures for Health).
- Ask a Friend Who Bakes Gluten-Free Bread: If you happen to know someone who is already an experienced gluten-free sourdough bread baker, they might be incredibly generous and willing to share a portion of their established gluten-free starter with you. This is a fantastic way to get started with a healthy, active culture.
- Embark on the Rewarding Journey of Making Your Own Gluten-Free Bread Starter from Scratch: For the truly adventurous and those who love to witness the magic of baking from the very beginning, creating your own gluten-free sourdough bread starter from scratch is an incredibly rewarding option! While it does require about a week or so of daily attention and feeding, it’s a fascinating process that connects you deeply to the art of sourdough baking. (External Link Suggestion: Link to a comprehensive, user-friendly guide on how to make a gluten-free sourdough bread starter from scratch. Search for “gluten-free sourdough starter recipe” on reputable baking websites known for sourdough expertise).
Feeding and Maintaining Your Gluten-Free Bread Starter: Keeping it Alive and Thriving
Once you have your precious gluten-free starter in hand, the key to successful gluten-free sourdough bread baking is to keep it alive, active, and thriving through regular “feedings.” Feeding your starter essentially replenishes its food supply, providing fresh flour and water for the yeasts and bacteria to consume. This keeps them happy, bubbly, and ready to leaven your gluten-free sourdough bread.
- Regular Feeding Schedule: Typically, you’ll need to feed your gluten-free starter every 12 to 24 hours if you’re storing it at room temperature. If you prefer to slow down its activity and store it in the refrigerator, you can reduce the feeding frequency to about once a week.
- The 1:1:1 Feeding Ratio: Simplicity and Balance: A commonly used and effective feeding ratio for gluten-free sourdough bread starters is the simple 1:1:1 ratio – this means using equal parts starter, gluten-free flour blend, and water, all measured by weight. For instance, you could use 50g of your active gluten-free sourdough starter, 50g of your gluten-free flour blend (from the recipe we provided), and 50g of fresh, clean water.
- Discarding (Optional, but Helps Maintain Starter Vigor): Before each feeding session, you have the option to discard a portion of your gluten-free starter, keeping only about 50g as your base. Discarding helps prevent you from accumulating an excessive amount of starter over time. Don’t worry, this “discard” isn’t waste! You can get creative and use the discarded starter in delicious “discard recipes” like gluten-free sourdough bread discard pancakes, waffles, or crackers! If you don’t want to use discard recipes, you can simply compost it.
- Signs of a Healthy, Active Gluten-Free Bread Starter: A thriving gluten-free starter will exhibit telltale signs of life! It should be bubbly throughout, showing active fermentation. It will have a slightly tangy, pleasantly sour aroma. And its consistency should resemble a thick pancake batter – pourable but not too thin.
Essential Equipment for Gluten-Free Sourdough Bread Baking: Setting Yourself Up for Success
While you certainly don’t need a kitchen overflowing with specialized gadgets to bake amazing gluten-free sourdough bread, having a few key pieces of equipment on hand will significantly streamline your baking process, make it more enjoyable, and ultimately contribute to more consistently successful results.
Kitchen Scale: Precision is Paramount in Gluten-Free Sourdough Bread Baking
Baking, and especially sourdough baking, is more akin to a precise science than just casual cooking. Using a digital kitchen scale to accurately measure your ingredients by weight is highly recommended, and it becomes even more crucial when you’re venturing into gluten-free baking. Volume measurements using cups and spoons can be surprisingly inconsistent, leading to variations in your dough hydration and ultimately, your final gluten-free sourdough bread loaf. Grams provide the precision you need for reliable results every time!
Mixing Bowls: A Variety of Sizes for Every Stage of Gluten-Free Sourdough Bread Making
You’ll find it incredibly useful to have a set of mixing bowls in various sizes. You’ll need them for different stages of the gluten-free sourdough bread process – mixing your levain (starter build), combining the main dough ingredients, and for the bulk fermentation (first rise) of your dough. Opt for glass or stainless steel bowls, as these materials are non-reactive and won’t interfere with the delicate flavors of your gluten-free sourdough bread.
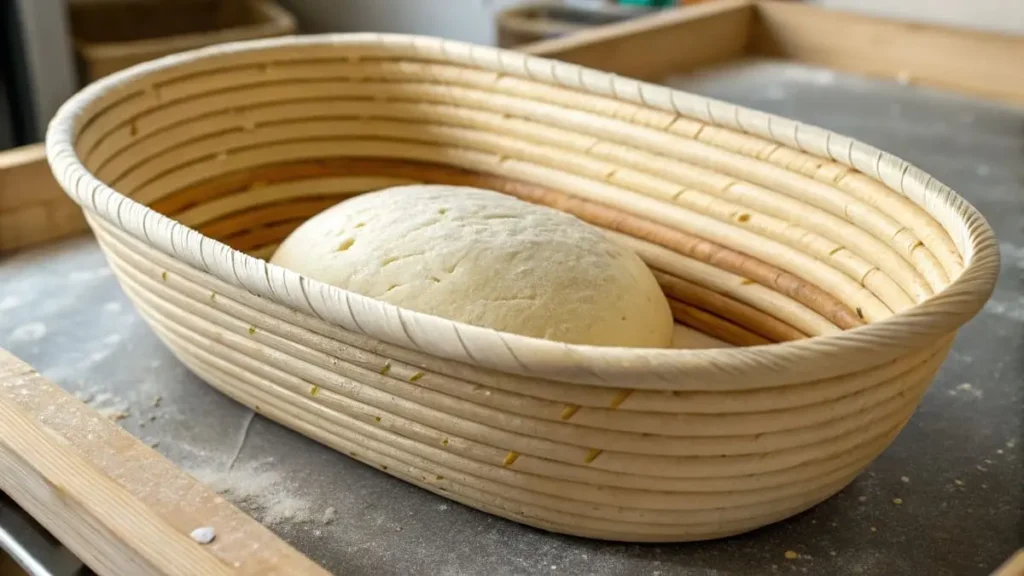
Banneton Basket (or a Bowl with Cloth): Shaping and Proofing Your Gluten Free Sourdough Bread
A banneton basket is a specialized proofing basket, often crafted from natural rattan, specifically designed for sourdough baking. It plays a vital role in shaping your gluten-free sourdough bread dough during the final proofing stage. The banneton basket also imparts those beautiful, characteristic spiral rings onto the crust of your baked loaf, adding a touch of professional artistry. If you don’t yet own a banneton, don’t worry! You can easily improvise by using a regular mixing bowl lined with a clean, well-floured kitchen towel or a piece of cheesecloth.
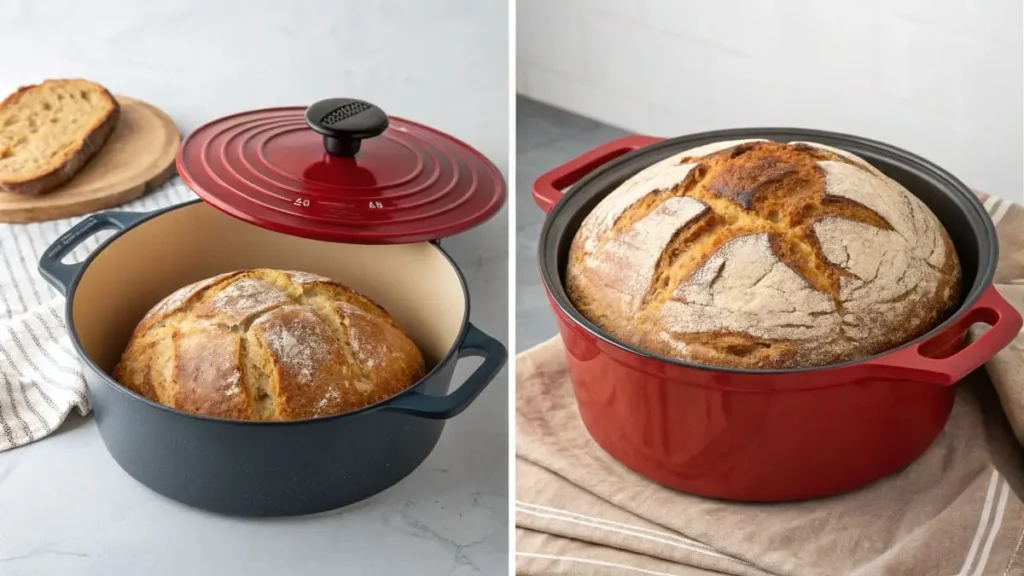
Dutch Oven or Baking Stone: Achieving Crusty Perfection in Gluten-Free Sourdough Bread
For amazing sourdough, especially gluten-free, a Dutch oven is a must-have. This heavy pot with a lid traps steam, creating the perfect humid environment for baking. This steam is key to developing a crispy, crackly crust and a soft, airy interior in your gluten-free sourdough. While baking stones can work, you’ll need to add steam separately; the Dutch oven simplifies achieving that perfect crust.
Bench Scraper (or Dough Scraper): Your Indispensable Tool for Handling Sticky Gluten-Free Bread Dough
Gluten-free dough, by its very nature, is often stickier and more delicate to handle than traditional wheat-based dough. A bench scraper, also known as a dough scraper, is a flat, rectangular tool, typically made of metal or sturdy plastic, that becomes your indispensable assistant when working with gluten-free sourdough bread. It’s incredibly helpful for gently scraping sticky dough off your countertop, neatly dividing dough into portions, and carefully shaping your gluten-free sourdough bread loaf without tearing or deflating it.
Thermometer: Ensuring Perfect Water and Dough Temperatures for Gluten-Free Sourdough Bread
Water temperature plays a crucial role in activating the yeast in your sourdough starter and ensuring optimal fermentation. Dough temperature also influences the speed and consistency of fermentation. An instant-read thermometer is an invaluable tool for precisely checking the water temperature when you’re preparing your levain and mixing your dough. Furthermore, a thermometer is essential for verifying the internal temperature of your baked gluten-free sourdough bread to guarantee that it’s fully cooked through and not gummy in the center.
Step-by-Step Guide: Mastering the Art of Making Perfect Gluten-Free Sourdough Bread at Home
Now for the most exciting part – let’s actually get our hands floury and bake some truly amazing gluten-free sourdough bread! We’ll break down the entire process into clear, manageable steps, making it easy for you to follow along and achieve gluten-free sourdough bread success.
Step 1: Preparing Your Gluten-Free Sourdough Bread Starter (Building the Levain)
Before we even think about mixing the main dough for our gluten-free sourdough bread, we need to prepare our sourdough starter. This crucial step is called building a levain (pronounced luh-VAN). Think of it as giving your gluten-free sourdough starter a powerful wake-up call and a nutritious meal right before we ask it to do the heavy lifting of leavening our bread.
Understanding Levain Builds: Why We “Feed” Our Starter Before Baking Gluten-Free Sourdough Bread
Building a levain is essential because it ensures that your gluten-free sourdough starter is at its absolute peak of activity precisely when you mix your dough. It’s like waking up your starter from its slumber and providing it with a generous and energizing meal, making it strong and robust enough to effectively leaven your gluten-free sourdough bread. This step is absolutely critical for achieving a good rise in your loaf and developing that signature, complex sourdough flavor profile that we all crave in gluten-free sourdough bread.
Our Levain Build Recipe: Simple and Effective for Gluten-Free Sourdough Bread
This is a straightforward and reliable example recipe for building your levain. You might need to slightly adjust the quantities in future bakes depending on the specific activity level of your gluten-free starter and your planned baking schedule.
(Recipe Box/Formatted Recipe for Levain Build – The Foundation of Gluten-Free Sourdough Bread Flavor)
- Ingredients:
- 20g Active Gluten-Free Sourdough Starter (make sure it’s bubbly and ready!)
- 100g Gluten-Free Flour Blend (use the blend recipe we provided earlier in this guide)
- 100g Warm Water (85-90°F / 29-32°C) – Crucially, use your thermometer to ensure the water temperature is accurate!
- Instructions:
- Find a clean jar or container – a pint-sized mason jar works perfectly. Combine the 20g of active gluten-free starter, 100g of your gluten-free flour blend, and 100g of warm water directly in the jar.
- Mix all three ingredients together thoroughly until the mixture is completely smooth and you don’t see any remaining clumps of dry flour.
- Cover the jar loosely with a lid or a piece of plastic wrap. You want to allow for a little air circulation, so don’t seal it airtight.
- Let it rise at warm room temperature (ideally around 70-75°F / 21-24°C). The rising process typically takes about 4 to 6 hours, but it can vary a bit depending on the inherent activity of your gluten-free starter and the ambient room temperature.
- Your levain is ready to use when it has approximately doubled in volume, is visibly bubbly throughout its structure, and successfully passes the float test.
The Float Test: The Simple Way to Know if Your Levain is Ready for Gluten-Free Sourdough Bread Baking
The float test is a quick and easy way to determine if your levain has reached its peak activity and is ready to be used in your gluten-free sourdough bread dough. Here’s how to perform the float test:
- Gently take a small spoonful of your prepared levain.
2. Carefully drop this spoonful of levain into a glass of room temperature water.
3. Observe what happens. If the spoonful of levain floats on the surface of the water, it’s a clear indication that it’s ready to go! Floating means it’s full of air bubbles produced by active fermentation and is sufficiently active to effectively leaven your gluten-free sourdough bread.
4. However, if the spoonful of levain sinks to the bottom of the glass, it means it needs a bit more time to ferment and develop further activity. Simply allow it to continue rising for a little longer at room temperature and then repeat the float test after about an hour.
Step 2: Mixing the Dough: Hydration is Key, Especially in Gluten-Free Sourdough Bread (But Can Be Tricky!)
Gluten-free dough behaves differently from traditional wheat-based dough. One notable difference is that gluten-free dough is often characterized by higher hydration levels (meaning it contains a greater proportion of water relative to flour). It can also feel stickier to the touch than wheat dough. Don’t be alarmed if your gluten-free sourdough bread dough seems quite wet and sticky – this is perfectly normal and expected!
Understanding Hydration in Gluten-Free Dough: Why It’s Higher for Gluten-Free Sourdough Bread
Gluten-free flours are more absorbent than wheat flour, requiring higher water levels in sourdough recipes. This extra hydration is essential for gluten-free sourdough to achieve a workable dough that isn’t dry or crumbly. Ultimately, higher hydration leads to a softer, more airy gluten-free sourdough bread with a desirable texture and open crumb.
Autolyze (Optional but Highly Recommended): Dramatically Improving Gluten-Free Sourdough Bread Texture
Autolyse (pronounced AUTO-lees) is a somewhat fancy-sounding baking term, but the technique itself is surprisingly simple. It essentially means mixing only the flour and water together from your gluten free sourdough bread recipe and then allowing this mixture to rest, untouched, for a period of time before you incorporate the gluten-free starter (levain) and salt. This step is technically optional in gluten-free sourdough bread baking, but it is highly recommended because it can dramatically improve the final texture of your bread, making it softer, more extensible, and easier to work with.
- In your mixing bowl, combine only the gluten-free flour blend and the warm water that are called for in the main dough recipe (we’ll provide the main dough recipe details in the next section!). Make sure you are using the correct amounts of flour and water as specified in the recipe.
- Mix these two ingredients together just until the flour is fully hydrated and there are no visible dry patches of flour remaining. The mixture will likely look somewhat shaggy and not perfectly smooth at this stage.
- Cover the mixing bowl with a lid or plastic wrap to prevent the surface from drying out. Then, simply let it rest undisturbed at room temperature for a period of 20 to 30 minutes.
- During this autolyse rest period, something wonderful happens! The gluten-free flours will fully hydrate, absorbing the water and becoming more relaxed. This process results in a dough that is noticeably smoother, more extensible (stretchier), and generally easier to handle in the subsequent steps of gluten-free sourdough bread baking.
Mixing the Main Dough: Gentle Handling is Key for Gluten-Free Sourdough Bread
Now, we’re ready to combine all the remaining ingredients to form our gluten-free sourdough bread dough. Remember to handle gluten-free dough gently as we don’t want to overwork it.
- Ingredients:
- All of the Levain from Step 1 (it should be bubbly, active, and ready to go after passing the float test!)
- 400g Gluten-Free Flour Blend (use the blend recipe we shared earlier in this guide)
- 350g Warm Water (85-90°F / 29-32°C) (You might need to make slight adjustments to this water amount in future bakes depending on your specific gluten-free flour blend – start with this amount and carefully observe how the dough feels)
- 10g Salt
- (Optional: 1 tbsp Olive Oil – For added moisture and flavor. Good for beginners as it makes the dough slightly easier to handle.)
- Instructions:
- If you are choosing to do the autolyse step: After the 20-30 minute autolyse rest period, add the prepared levain and the salt (and olive oil, if you’re using it) directly to the bowl containing the flour and water mixture.
- If you are skipping the autolyse step: In a large bowl, combine the gluten-free flour blend and warm water. Then, add the levain, salt, and olive oil (if using) to the bowl.
- Mix all the ingredients together until they are just combined. Remember, gluten-free dough is inherently sticky and will have a somewhat shaggy appearance. It’s important not to overmix gluten-free dough in the way you might mix wheat-based dough. We simply want to ensure all the ingredients are evenly incorporated.
- Cover the bowl and let the dough rest for 30 minutes. This is called the rest period and allows the psyllium husk to fully hydrate and work its binding magic.
Step 3: Bulk Fermentation (The First Rise): Time and Temperature Are Critical for Gluten-Free Sourdough Bread
Bulk fermentation, also known as the first rise, is a pivotal stage in gluten-free sourdough bread baking. This is when the real sourdough magic truly unfolds! The wild yeasts and beneficial bacteria within your gluten-free starter spring into action, diligently working on the dough. They consume sugars and produce carbon dioxide gas, which causes the dough to rise and develop its characteristic sourdough flavor complexity.
Understanding Bulk Fermentation: Developing Flavor and Structure in Gluten-Free Sourdough Bread
During the bulk fermentation process, your gluten-free sourdough bread dough undergoes a transformation. It gradually becomes lighter and more airy in texture. Most importantly, it’s during bulk fermentation that the dough develops that signature tangy sourdough flavor that we all love. Furthermore, even though gluten-free dough lacks gluten, it still gains strength and structure during bulk fermentation, largely thanks to the binding action of the psyllium husk and the metabolic activity of the gluten-free starter.
Stretch and Folds (or Coil Folds): Building Strength in Delicate Gluten-Free Bread Dough
Since gluten-free dough doesn’t contain gluten, the protein that naturally develops strength and elasticity in wheat dough, we employ a technique called stretch and folds (or coil folds) during the bulk fermentation stage to manually build structure. These gentle manipulations of the dough, performed at intervals, help to organize the dough, improve its extensibility, and effectively trap air bubbles within its structure.
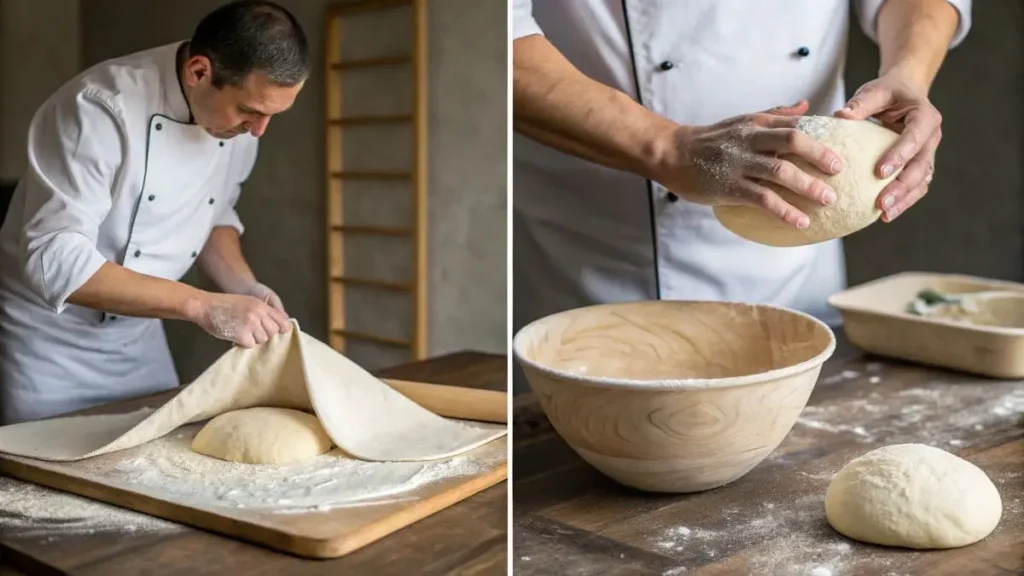
How to do Stretch and Folds:
- During the first 1-2 hours of bulk fermentation, perform 3-4 sets of stretch and folds every 30 minutes.
- Wet your hands with a little water to prevent the dough from sticking too much.
- Gently reach under one side of the dough, lift it up and stretch it upwards as far as it will go without tearing.
- Fold that stretched portion of dough over the rest of the dough.
- Rotate the bowl 90 degrees and repeat the stretch and fold on another side of the dough.
- Do this until you’ve stretched and folded all four sides of the dough.
- After each set of stretch and folds, cover the bowl and let the dough rest for 30 minutes.
Bulk Fermentation Time and Temperature Guidelines for Gluten-Free Sourdough Bread
Bulk fermentation time depends on the temperature of your kitchen and the activity of your starter.
- Room Temperature (70-75°F / 21-24°C): Bulk fermentation might take approximately 3-5 hours.
- Cooler Environment (65-70°F / 18-21°C): It will take longer, perhaps 5-7 hours or more.
How to Tell When Bulk Fermentation is Complete for Gluten-Free Sourdough Bread
It’s not about doubling in volume like wheat dough. Look for these visual cues:
- Slight Increase in Volume: The dough will have puffed up a bit, but not dramatically.
- Bubbles: You should see some bubbles on the surface of the dough and around the sides of the bowl.
- Jiggle: The dough will feel softer and jigglier than when you first mixed it.
- Domed Surface: The surface of the dough might become slightly domed.
It’s better to slightly under-ferment gluten-free sourdough bread than over-ferment it, especially when you’re starting out.
Step 4: Shaping and Proofing (Second Rise): Gently Does It for Gluten-Free Sourdough Bread
After bulk fermentation, we’ll gently shape the dough and let it proof (rise a second time) before baking.
Shaping Gluten-Free Sourdough Bread: Be Gentle and Quick
Gluten-free dough is delicate, so handle it gently during shaping.
- Lightly flour your work surface and your bench scraper.
- Gently turn the dough out of the bowl onto your floured surface.
- Shape it into a round or oblong loaf. Avoid degassing (pressing out all the air bubbles) too much. We want to keep that air inside!
- Use your bench scraper to help you shape and move the dough.
Using a Banneton Basket (or Bowl): Providing Support for Gluten-Free Sourdough Bread
- Generously flour your banneton basket (or bowl lined with a floured cloth) with rice flour. This will prevent the dough from sticking.
- Carefully place the shaped dough into the banneton basket, seam-side up.
- If using a bowl, make sure the dough is well-supported by the cloth.
Proofing in the Refrigerator (Cold Proof): Flavor Development and Easier Handling of Gluten-Free Sourdough Bread
Cold proofing in the refrigerator is highly recommended for gluten-free sourdough bread.
- Flavor Development: Cold proofing slows down fermentation, allowing more complex sourdough flavors to develop over time.
- Easier Handling: Cold dough is firmer and easier to score (make cuts on the surface) before baking.
- Baking Schedule Flexibility: You can proof overnight and bake in the morning, fitting sourdough baking into your schedule.
Proofing Time Guidelines for Gluten-Free Sourdough Bread
- Refrigerator (38-40°F / 3-4°C): Proof for 12-18 hours. You can proof for longer if you want a tangier flavor.
Step 5: Baking to Perfection: Crust and Crumb for Gluten-Free Sourdough Bread
The final step – baking! This is where we transform our proofed dough into a beautiful loaf of gluten-free sourdough bread.
Preheating Your Dutch Oven (or Baking Stone): Essential for Crusty Gluten-Free Sourdough Bread
- Dutch Oven: Place your Dutch oven (with the lid on) in the oven and preheat your oven to 450°F (232°C) for at least 30-45 minutes. The hot Dutch oven is crucial for creating that crispy crust.
- Baking Stone: Place your baking stone in the oven and preheat to 475°F (246°C) for at least 30-45 minutes.
Scoring the Dough: Controlling Expansion and Design for Gluten-Free Sourdough Bread
Scoring means making cuts on the surface of the dough before baking. This allows the dough to expand predictably in the oven and prevents it from bursting randomly. It also creates those beautiful decorative patterns on the crust.
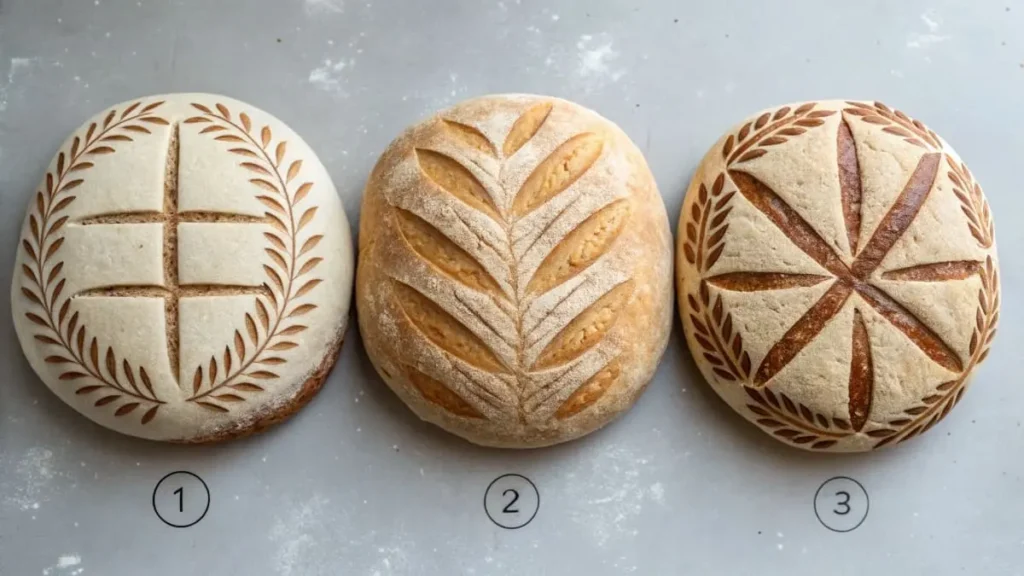
Scoring Tips:
- Use a sharp knife or a lame (a special scoring blade).
- Score about ¼ to ½ inch deep.
- Score quickly and confidently.
Baking in the Dutch Oven (or on Baking Stone): Steam for Crust, Then Dry Heat for Gluten-Free Sourdough Bread
Dutch Oven Baking Instructions:
- Carefully remove the hot Dutch oven from the oven.
- Gently take the dough out of the banneton and place it in the hot Dutch oven.
- Score the dough.
- Cover the Dutch oven with the lid and bake for 20 minutes at 450°F (232°C). This is the steaming phase.
- Reduce the oven temperature to 425°F (218°C).
- Remove the lid and bake for another 30-40 minutes, or until the crust is deeply golden brown and the internal temperature reaches 205-210°F (96-99°C). Use your thermometer to check!
Baking Stone Baking Instructions:
- Carefully slide the proofed dough onto the hot baking stone.
- Score the dough.
- Create steam in the oven. You can do this by:
- Placing a pan of hot water on the bottom rack of the oven.
- Pouring a cup of hot water into a hot cast iron skillet placed on a lower rack (be careful of the steam!).
- Spraying water into the oven a few times in the first few minutes of baking (quickly close the door to trap the steam).
- Bake with steam for the first 20 minutes at 475°F (246°C).
- Remove the steam source and reduce the oven temperature to 425°F (218°C).
- Bake for another 30-40 minutes, or until the crust is deeply golden brown and the internal temperature reaches 205-210°F (96-99°C).
Cooling Completely: Patience is Rewarded for Gluten-Free Sourdough Bread!
This is the hardest part – waiting! But it’s crucial.
- Carefully remove the baked loaf from the Dutch oven or baking stone and place it on a wire rack to cool completely.
- Let it cool for at least 2-3 hours before slicing. This allows the crumb to set properly and prevents it from being gummy.
Troubleshooting Your Gluten-Free Sourdough Bread: Common Issues & Solutions
Baking sourdough is a journey, and even experienced bakers encounter bumps along the road. Don’t worry if your gluten-free sourdough bread doesn’t come out perfectly every time at first. Let’s dive deeper into common problems and how to troubleshoot them, so you can bake with confidence!
Flat or Dense Gluten-Free Sourdough Bread Loaf:
This is a disheartening result, but often fixable! A flat, dense loaf usually means something went wrong with the rise or structure development.
Starter Not Active Enough
- Problem: Your loaf is dense and didn’t rise much. It might be quite heavy and lack air pockets (crumb).
- Detailed Explanation: A sourdough starter is your leavening agent. If it’s not vigorous enough, it won’t produce enough gas to make the dough rise properly. This can happen if your starter is newly made, hasn’t been fed regularly, or has been kept in a cold environment, slowing down its activity.
- Solutions:
- Observe Your Starter: Before baking, make absolutely sure your starter is bubbly, has at least doubled in size after its last feeding, and passes the float test. These are key indicators of a lively starter ready to bake.
- Feed More Frequently: If your starter seems sluggish, increase the frequency of feedings to every 12 hours for a couple of days, keeping it at a consistently warm room temperature (around 70-75°F / 21-24°C). This can help boost its activity.
- Warmer Environment: Yeast thrives in warmth. Ensure your starter is kept in a warm spot in your kitchen, especially after feeding and during levain build. Avoid cold drafts.
- Use a Reliable Starter: If you’re consistently having issues, consider getting a starter from a reputable source (as mentioned in the FAQ) to ensure you’re starting with a vigorous culture.
Under-Proofing
- Problem: The loaf is dense, possibly a bit gummy, and didn’t expand much in the oven. The crust might be pale and not very crisp.
- Detailed Explanation: Proofing (both bulk fermentation and final proofing) is crucial for gluten-free sourdough. Under-proofing means the dough didn’t have enough time to ferment and rise sufficiently before baking. The yeast hasn’t produced enough gas to create an airy structure.
- Solutions:
- Extend Bulk Fermentation: Ensure you’re bulk fermenting for long enough, paying attention to the visual cues (slight volume increase, bubbles, jiggle) rather than just the recipe’s time estimate. If your kitchen is cool, bulk fermentation will naturally take longer.
- Longer Final Proof: Allow the shaped dough to proof for the full recommended time (12-18 hours in the refrigerator) or even a bit longer, especially if your refrigerator is very cold. Gently poke the dough – it should feel slightly softer and pillowy, and spring back slowly.
- Warmer Proofing Environment (for bulk): While cold proofing is recommended for flavor, ensure your bulk fermentation is happening at a reasonably warm room temperature (ideally 70-75°F / 21-24°C) to encourage active fermentation.
Dough Too Wet or Too Dry
- Problem (Too Wet): The loaf might spread out flat, be very dense and gummy, and potentially difficult to bake through.
- Problem (Too Dry): The loaf might be very dense, crumbly, and not rise well. It could also be dry and hard.
- Detailed Explanation: The hydration level (water-to-flour ratio) is delicate in gluten-free baking. Too much water can weaken the structure, leading to spreading and density. Too little water and the dough won’t be extensible enough to rise and become airy.
- Solutions (Too Wet):
- Measure Accurately: Use a kitchen scale to precisely measure flour and water. Even slight variations in volume measurements can throw off hydration.
- Slightly Reduce Water: In your next bake, try reducing the water by 10-20g from the recipe. Observe the dough consistency during mixing. It should be sticky but somewhat manageable.
- Handle Gently: Very wet dough is more prone to spreading. Be extra gentle when shaping and transferring it to the banneton and Dutch oven.
- Solutions (Too Dry):
- Measure Accurately: Again, precision is key. Ensure you’re not accidentally using too much flour.
- Slightly Increase Water: If your dough consistently feels very stiff and dry, try adding 10-20g more water in your next bake. Add it gradually and mix until just combined.
- Autolyse: Autolyse (resting the flour and water mixture before adding starter and salt) can improve dough hydration and make it more extensible.
Gummy or Undercooked Center:
A gummy center is a common frustration, but often related to baking technique.
Baking Temperature Too High or Too Low
- Problem: The crust is browned (or even overly browned), but the inside is dense, wet, and gummy.
- Detailed Explanation: If the oven temperature is too high, the outside of the loaf can cook and brown too quickly, before the heat has had time to penetrate and cook the center thoroughly. Conversely, if the temperature is too low, the bread might not cook through properly.
- Solutions:
- Oven Thermometer: Invest in an oven thermometer to verify your oven’s accuracy. Oven temperatures can vary significantly from what the dial indicates.
- Adjust Baking Temperature: If your oven runs hot, slightly lower the temperature by 10-15°F. If it runs cool, increase it slightly. Follow the recipe’s temperature guidelines as a starting point.
- Lower Temperature After Initial Bake: In the Dutch oven method, the initial high temperature with the lid on is for crust development. Reducing the temperature after removing the lid allows the center to bake through more gently without burning the crust.
Insufficient Baking Time
- Problem: The center is gummy and undercooked, even if the crust looks browned.
- Detailed Explanation: Gluten-free bread, especially sourdough, often needs a longer baking time than wheat bread to ensure it’s fully cooked through. The internal structure needs to set properly to avoid gumminess.
- Solutions:
- Extend Baking Time: Don’t rely solely on visual cues (crust color). Even if the crust looks done, continue baking for an additional 10-15 minutes.
- Thermometer is Key: The most reliable way to check for doneness is to use an instant-read thermometer. Insert it into the center of the loaf from the bottom. The internal temperature should reach 205-210°F (96-99°C). If it’s below this, bake longer.
- “Thump Test”: You can also try the “thump test.” Tap the bottom of the loaf. It should sound hollow when fully baked, not dense or doughy.
Cracks on the Crust:
Cracks can sometimes be part of the rustic charm of sourdough, but excessive, uncontrolled cracking can indicate issues.
Over-Proofing
- Problem: Large, jagged cracks appear on the crust in random places, not just along your scores. The loaf might also be slightly flatter than desired.
- Detailed Explanation: Over-proofed dough can become weak and lose its elasticity. When it bakes, it expands rapidly and uncontrollably, leading to bursting and cracking in areas you didn’t intend.
- Solutions:
- Monitor Proofing Time: Be vigilant about proofing time. Don’t let the dough proof for excessively long periods, especially at warmer temperatures.
- Gentle Handling: Over-proofed dough is delicate. Handle it very gently during shaping and transferring to the Dutch oven to avoid deflating it.
- Slightly Shorter Proof: In future bakes, try slightly reducing the proofing time, especially if your kitchen is warm or your starter is very active.
Scoring Not Deep Enough
- Problem: Cracks appear alongside or instead of your scores. The loaf might not expand as cleanly along the scored lines.
- Detailed Explanation: Scoring creates weak points that guide the dough’s expansion in the oven. If your scores are too shallow, they might not be effective enough, and the dough will find other, weaker areas to burst.
- Solutions:
- Score Deeper: Make sure you’re scoring to the recommended depth (¼ to ½ inch). Don’t be too hesitant!
- Sharp Scoring Tool: Use a very sharp knife or lame. A dull tool can drag and create shallow, ineffective scores.
- Confident Scoring: Score quickly and confidently in one smooth motion.
Tough Crust:
A tough crust can make sourdough less enjoyable to eat.
Over-Baking
- Problem: The crust is excessively hard, thick, and difficult to chew. The inside might also be slightly dry.
- Detailed Explanation: Over-baking, especially at a high temperature, can dry out the crust and make it tough.
- Solutions:
- Reduce Baking Time: Slightly reduce the overall baking time in your next attempt. Start checking for doneness earlier.
- Lower Temperature: If your crust is consistently too tough, try slightly lowering the oven temperature for the uncovered baking phase (e.g., reduce from 425°F to 400°F).
- Monitor Crust Color: Watch the crust color during baking. Aim for a deep golden brown, but not overly dark or burnt.
Lack of Steam
- Problem: The crust is thick, hard, and potentially pale or dull in color. It might not have that desirable crispiness.
- Detailed Explanation: Steam in the initial baking phase is crucial for crust development in sourdough. Steam keeps the surface of the dough moist for longer, allowing for maximum expansion and the development of a thin, crisp crust. Without enough steam, the crust can set too early and become tough.
- Solutions:
- Dutch Oven: Using a Dutch oven with a lid is the easiest way to create steam. Ensure the lid is tightly sealed during the initial baking phase.
- Steam Methods for Baking Stone: If using a baking stone, make sure you are using one of the steam-generating methods described in the recipe (pan of hot water, hot skillet with water, oven spritzing).
- Ensure Adequate Steam: Check that your chosen steam method is producing visible steam in the oven during the first 20 minutes of baking.
Variations & Creative Gluten-Free Sourdough Bread Ideas
Once you’re comfortable with the basic recipe, the fun really begins! Let’s explore some delicious variations to spice up your gluten-free sourdough bread baking.
Seeded Gluten-Free Sourdough Bread: Adding Seeds to the Dough
Seeds add wonderful flavor, texture, and nutrition to your gluten-free sourdough.
Adding Seeds to the Dough (Sesame, Poppy, Sunflower, etc.)
- Seed Quantity: Start with about ½ cup of seeds for one loaf of sourdough. You can adjust this to your preference in future bakes.
- Seed Types: Get creative! Sesame seeds (white or black), poppy seeds, sunflower seeds, flax seeds (brown or golden), chia seeds, pumpkin seeds (pepitas), hemp seeds, and even quinoa seeds all work beautifully. You can use a single type or a mix.
- When to Add: Add seeds during the dough mixing stage, right after the autolyse rest (if using), or during the first set of stretch and folds. Adding them earlier allows them to hydrate slightly and distribute more evenly throughout the dough.
- Mixing In: Gently fold the seeds into the dough until they are evenly distributed. Avoid overmixing.
Toasted Seed Topping
- Toasting Seeds: Toasting seeds before using them as a topping dramatically enhances their flavor and aroma. Spread seeds in a dry pan over medium heat and toast, stirring frequently, until they become fragrant and lightly golden brown (be careful not to burn them). Let them cool completely before using.
- Applying Topping:
- Water Brush: Before the final proof (or just before baking), lightly brush the top surface of the shaped dough with a little water. This helps the seeds adhere.
- Generous Sprinkle: Sprinkle the toasted seeds generously over the wet surface of the dough, pressing them gently to ensure they stick.
- Bake as Usual: Bake the seeded loaf as directed in the main recipe.
Herb and Garlic Gluten Free Sourdough Bread:
Infuse your sourdough with savory, aromatic goodness!
Incorporating Herbs and Roasted Garlic
- Herb Quantity: Start with about ¼ cup of finely chopped fresh herbs for one loaf. You can adjust this based on your herb preference.
- Herb Choices: Rosemary, thyme, oregano, chives, parsley, basil, dill, and sage are all excellent choices. Use a single herb or combine complementary flavors. For example, rosemary and thyme are classic together, or try a Mediterranean blend of oregano, basil, and thyme.
- Roasted Garlic: Roasted garlic adds a mellow, sweet, and deeply savory garlic flavor, much milder than raw garlic.
- Roast Garlic: To roast garlic, cut off the top of a garlic head to expose the cloves. Drizzle with olive oil, wrap in foil, and roast at 400°F (200°C) for 40-50 minutes, or until cloves are soft and caramelized. Let cool, then squeeze out the roasted garlic cloves.
- Garlic Quantity: Use 2-3 roasted garlic cloves per loaf, mashed or finely chopped.
- When to Add Herbs and Garlic: Add chopped fresh herbs and roasted garlic to the dough during the mixing stage, after the autolyse rest, or during the first set of stretch and folds.
- Mixing In: Gently fold the herbs and garlic into the dough until evenly distributed.
Flavor Combinations (Rosemary & Garlic, Thyme & Garlic)
- Rosemary & Garlic: A classic and robust combination. Use about 2 tablespoons of finely chopped fresh rosemary and 2-3 roasted garlic cloves. Perfect for savory dishes, soups, or grilled cheese.
- Thyme & Garlic: A slightly more delicate and earthy combination. Use about 2 tablespoons of fresh thyme leaves and 2-3 roasted garlic cloves. Delicious with roasted vegetables, chicken, or as a simple table bread.
- Mediterranean Blend: Combine oregano, basil, and thyme (about 1 tablespoon each, chopped) with 2-3 roasted garlic cloves for a bright, aromatic loaf that pairs wonderfully with Mediterranean cuisine, salads, or pasta.
Gluten-Free Sourdough Bread Pizza Crust:
Transform your sourdough into a fantastic pizza base!
Adapting the Recipe for Pizza
- Reduce Hydration: As mentioned earlier, slightly reduce the water in the main dough recipe by about 20-30g (from 350g to around 320-330g). This will make the dough a bit less sticky and easier to handle for pizza shaping.
- Olive Oil: Adding a tablespoon or two of olive oil to the dough is beneficial for pizza crust. It adds flavor, helps with browning, and contributes to a slightly softer, more pliable crust.
- Bulk Fermentation: Bulk ferment the dough as directed in the main recipe.
- Shaping Pizza Crust:
- Divide Dough: After bulk fermentation, gently divide the dough into portions for individual pizzas (e.g., 2-3 portions for medium-sized pizzas).
- Shape into Rounds: On a well-floured surface, gently stretch or pat each portion of dough into a pizza round. Gluten-free dough can be a bit less elastic, so handle it gently and work slowly. You can use your hands or a rolling pin (lightly floured) to shape it.
- Proof (Optional): You can let the shaped pizza crusts proof for a short time (15-30 minutes) at room temperature for a slightly airier crust, or bake them directly.
Baking Tips for Gluten-Free Pizza Crust
- Preheat Baking Stone/Steel: Preheat your baking stone or pizza steel in the oven to a high temperature (500-550°F / 260-288°C) for at least 45-60 minutes. A very hot baking surface is essential for a crispy pizza crust.
- Assembly: Quickly assemble your pizzas with sauce, cheese, and toppings on a pizza peel dusted with cornmeal or semolina (for easy sliding onto the hot stone).
- Baking Time: Bake pizzas for 10-15 minutes, or until the crust is golden brown and the cheese is melted and bubbly. Baking time will depend on your oven temperature and the thickness of your crust and toppings.
- Broiling (Optional): For extra browning and crispness on the cheese and toppings, you can broil the pizza for the last 1-2 minutes of baking, watching very carefully to prevent burning.
Serving and Storing Your Gluten-Free Sourdough Bread Masterpiece
You’ve poured your heart into baking this amazing loaf – let’s make sure you serve it in style and store it properly to enjoy every last crumb!
Serving Suggestions: From Simple to Gourmet
Let’s elevate those serving ideas and get your mouth watering!
Classic Butter and Jam
- Beyond Basic Butter: Think beyond plain butter! Use high-quality cultured butter, European-style butter, or even flavored butters (like honey butter or herb butter).
- Jam Pairings: Experiment with artisanal jams and preserves. Fig jam, raspberry jam, apricot jam, or even a spiced apple butter can be heavenly with the tang of sourdough.
- Warm Bread: Slightly warm slices of gluten-free sourdough are especially delightful with butter and jam. A quick toast or a few seconds in a warm oven will do the trick.
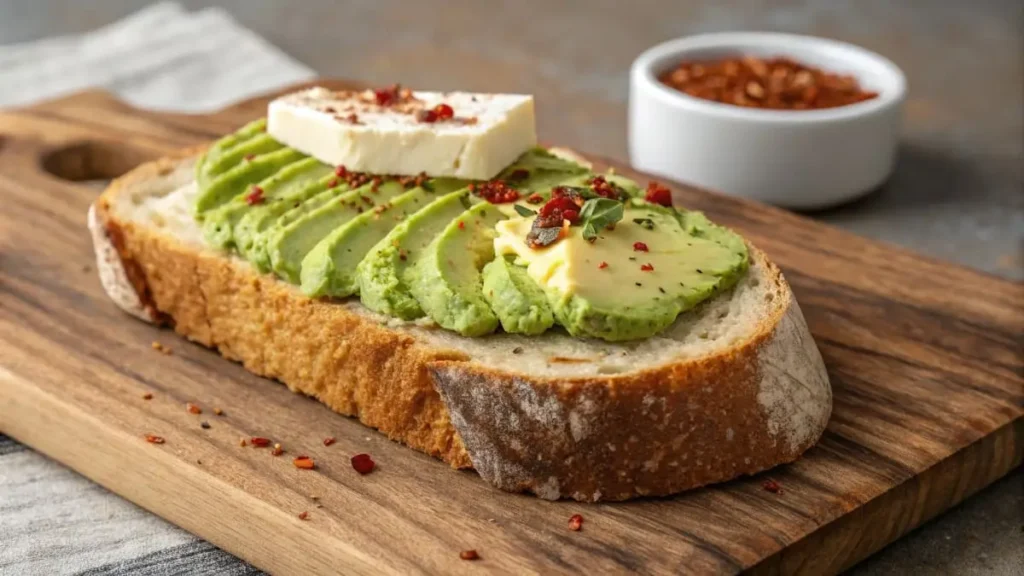
Avocado Toast with Everything Bagel Seasoning
- Elevated Avocado: Mash avocado with a squeeze of lemon or lime juice, a pinch of sea salt, and a dash of red pepper flakes for extra flavor.
- Everything Bagel Seasoning: Don’t skimp on the everything bagel seasoning! It adds incredible flavor and texture.
- Gourmet Toppings: Take your avocado toast to the next level with toppings like:
- Fried or poached egg
- Smoked salmon or trout
- Crumbled feta cheese
- Sliced tomatoes or radishes
- Microgreens or sprouts
- A drizzle of hot sauce or chili oil
Grilled Cheese with Gourmet Cheese
- Cheese Combinations: Don’t limit yourself to cheddar! Explore gourmet cheese combinations for truly decadent grilled cheese:
- Gruyere & Caramelized Onions: Nutty Gruyere pairs beautifully with sweet caramelized onions.
- Brie & Apple Slices: Creamy brie and thinly sliced apples create a sophisticated sweet and savory grilled cheese.
- Fontina & Prosciutto: Melted Fontina and crispy prosciutto are a luxurious and flavorful combination.
- Sharp Cheddar & Bacon Jam: Elevate classic cheddar with the smoky sweetness of bacon jam.
- Sourdough Advantage: Gluten-free sourdough’s sturdy texture holds up perfectly in grilled cheese, providing a satisfying chew and robust flavor.
Soup and Sourdough Pairing
- Soup and Sourdough Synergies: Consider the flavor profiles of your soup and sourdough when pairing:
- Hearty Tomato Soup: A classic pairing! The tang of sourdough cuts through the richness of tomato soup.
- Creamy Vegetable Soups: Sourdough provides a nice textural contrast to creamy soups like butternut squash or potato leek.
- Rustic Bean Soups: Earthy bean soups like lentil or white bean soup are complemented by the robust flavor of sourdough.
- French Onion Soup: Sourdough croutons or toasted sourdough slices are perfect for soaking up the flavorful broth of French onion soup.
- Serving Style: Serve warm sourdough slices alongside bowls of soup for dipping and sopping up every last drop.
Storing Gluten-Free Sourdough Bread to Keep it Fresh
Proper storage is key to maintaining the quality of your hard-earned gluten-free sourdough.
Room Temperature Storage (Short-Term)
- Bread Box: A bread box is ideal for room temperature storage. It provides a slightly enclosed environment that helps maintain humidity and prevent the bread from drying out too quickly.
- Loose Wrapping: If you don’t have a bread box, loosely wrap the loaf in a clean, breathable kitchen towel or a paper bag. Loosely wrapped allows some air circulation, preventing the crust from becoming overly soft while still protecting the crumb.
- Avoid Plastic Bags (Room Temp): At room temperature, avoid storing gluten-free sourdough in airtight plastic bags. Plastic traps moisture, which can soften the crust and make the bread lose its desirable texture.
Freezing for Longer Shelf Life
- Slicing Before Freezing: Slicing the loaf before freezing is highly recommended. It makes it much more convenient to thaw and use individual slices as needed.
- Freezer-Safe Bags or Containers: Use high-quality freezer-safe bags or airtight containers to prevent freezer burn.
- Parchment Paper Between Slices: Place parchment paper squares between slices before freezing to prevent them from sticking together, making it easy to remove individual slices.
- Thawing:
- Toasting from Frozen: You can toast frozen slices directly in a toaster or toaster oven. They crisp up beautifully from frozen.
- Room Temperature Thawing: To thaw the whole loaf or multiple slices at room temperature, remove them from the freezer bag/container and let them thaw on a wire rack for about 1-2 hours, or until fully thawed.
- Quick Thawing (Microwave – Not Ideal for Crust): Microwaving is not ideal for maintaining crust crispness, but if you need to thaw slices quickly, you can microwave them in short intervals (10-15 seconds at a time) until thawed, but be careful not to overheat and make them rubbery.
- Reheating (Optional): After thawing, you can reheat slices in a toaster, toaster oven, or oven to crisp up the crust and warm the bread through.
Frequently Asked Questions (FAQ) About Gluten Free Sourdough Bread
Q 1: Is gluten-free sourdough bread really sourdough?
- Yes! The “sourdough” part refers to the fermentation process using a starter culture, not the type of flour. Gluten-free sourdough bread uses a gluten-free starter and gluten-free flours, but it still undergoes the same fermentation process as traditional sourdough, resulting in similar benefits like improved digestibility and flavor.
Q 2: Can I make gluten-free sourdough bread with just one type of flour?
- While technically possible, it’s highly recommended to use a blend of gluten-free flours and starches for the best texture in gluten-free sourdough bread. Single flours often lack the balance of structure, chewiness, and tenderness that a blend provides. Our recommended flour blend (brown rice flour, tapioca starch, sorghum flour, potato starch, psyllium husk) is designed for optimal results.
Q 3: My gluten-free sourdough bread is always sticky – what am I doing wrong?
- Stickiness is common with gluten-free dough due to the higher hydration and the nature of gluten-free flours. Ensure you are using the correct flour blend and measuring ingredients accurately (especially water). Wetting your hands and bench scraper helps when handling sticky dough. If it’s excessively sticky, you might slightly reduce the water in your next bake, but generally, a slightly sticky dough is normal for gluten-free sourdough bread.
Q 4: Where can I buy gluten-free sourdough bread starter?
- You can purchase gluten-free sourdough bread starters online from specialty baking suppliers. Websites like Breadtopia. You can also search on Etsy and Amazon for smaller sellers.
Q 5: How long does gluten-free sourdough bread starter last?
- A well-maintained gluten-free sourdough bread starter can last indefinitely! As long as you feed it regularly and keep it healthy, it can be a lifelong baking companion. Even if neglected, it can often be revived with consistent feedings.
Conclusion: Your Gluten-Free Sourdough Bread Journey Begins Now!
Congratulations! You’ve now got the knowledge and the recipe to embark on your gluten-free sourdough bread adventure. It might seem a little daunting at first, but with each loaf you bake, you’ll become more confident and skilled. Don’t be afraid to experiment, learn from any “oops” moments, and most importantly, enjoy the process and the delicious results. Get ready to fill your kitchen with the wonderful aroma of freshly baked gluten-free sourdough bread!
Loved making this? Share your experience in a review!
There are no reviews yet. Be the first one to write one.

